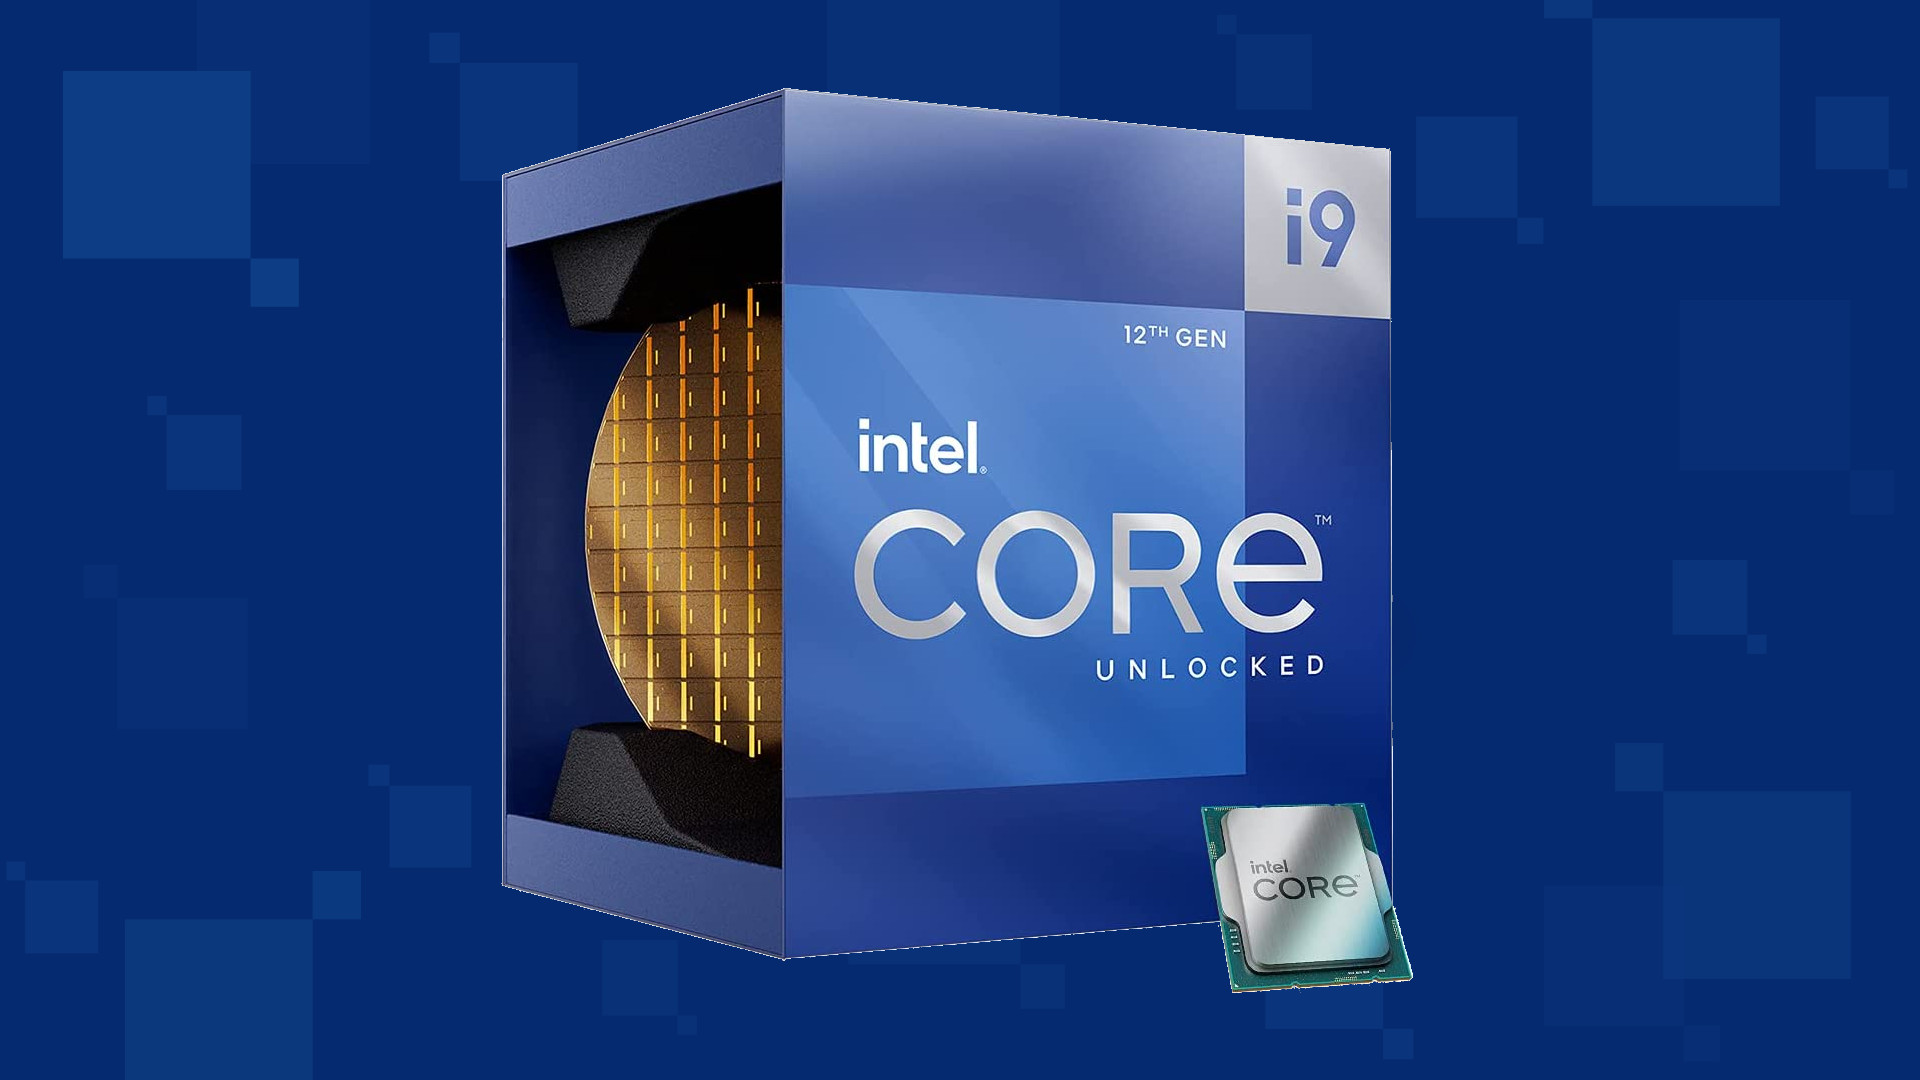
Raptor Lake, a new and upcoming Intel 13th generation CPU will break the 6GHz barrier for the first time ever in normal working mode, overclocked mode in Intel words will go as high as 8GHz. CPU will be 15% faster than Alder lake in single-threaded tasks and a stunning 41% faster in multi-threaded workloads.
The current world record for overclocking is 8.72GHz done with AMD FX-8370 and Intel is aiming at breaking that record with Raptor Lake, of course, this kind of extreme overclocking will require some top-of-the-line nitrogen cooling systems.
Raptor Lake will run on the current LGA 1700 socket, so you will not need to buy another motherboard for CPU and they will also be manufactured on a 10nm process which means that you will need to take care of cooling and power supply if they really go over 6GHz.
Mid-range Intel Core i5-13600K processor will come with 14 cores inside and 20 threads running at a maximum P-core frequency of 5.1GHz, while Core i7-13700K will have 16 cores and 24 threads and run on 5.3GHz max P-core frequency. Best i9-13900K will come packed with 24 cores, 8 of them will be P-cores, and the rest 16 are E-cores, and 32 threads. It will reach 5.4GHz frequency but it was stated it can go to 5.8GHz with Thermal Velocity Boost.
After this statement, we can clearly see that the 6GHz breaker CPU will probably be an i9 special KS variant. In other words, specially tested and picked existing i9 running at higher speeds as was with Alder Lake as well where normal i9-12900K ran at 5.2GHz while i9-12900KS was running at 5.5GHz.
If your printer has been working just fine and you suddenly get an error message saying, Printer not activated, error code 30”, then something is definitely wrong and it’s not good especially if you have lots of things to do. Worry not, as this post will help you resolve the printer issue. Simply follow each one of the given options below carefully.
Option 1 – Try running the Printer Troubleshooter
The first thing you can to resolve the printer issue is running the Printer Troubleshooter. This built-in troubleshooter can detect and automatically fix the problem for you. To use it, follow these steps:
Tap the Win + R keys to open the Run dialog box.
Next, type “msdt.exe /id PrinterDiagnostic” in the field and click OK or hit Enter to open the Printer Troubleshooter.
Then click the Next button and follow the next on-screen instructions to fix the issue with the printer.
Option 2 – Check if the concerned printer is set as the default one
It could be that the printer you are trying to use is not set as the default printer. This is mostly the case so to fix the issue, you need to set the concerned printer as default. To do that, follow the steps below.
Tap the Win + I keys to open the Settings app.
After opening Settings, select Devices from the menu and then click the Printers and scanners option.
From there, look for the printer you are using among the list of options. After you find it, click on it and select the Manage option.
Now click on the “Set as Default” option to set the printer as default.
Option 3 – Try updating the driver for USB Composite Device
The problem with your printer might also be caused by the USB Composite Device. It could be that the USB Composite Device is acting up. Thus, you need to remove and reinstall it. How? Follow the steps below.
First, click the Start button and type “device manager”.
Then click on the “Device Manager” from the search results to open it.
From there, look for the USB Composite Device option and right-click on it, and select the Update Driver from the options.
Restart your PC and then click the “Search automatically for updated driver software” option.
Now uninstall and remove the printer driver software and reinstall it then refresh.
Option 4 – Try updating all the drivers for your Printer
Tap the Win + R keys to launch Run.
Type in devmgmt.msc into the box and tap Enter or click OK to open the Device Manager.
After that, a list of device drivers will be displayed. Look for Print queues from the list of drivers displayed and click on it to see all the Printer drivers.
Next, right-click on each one of the drivers and select “Update driver” to update the driver. Do it for all the Printer drivers
After that, select the “Search automatically for updated driver software” option and then follow the instructions to complete the process.
Restart your PC and try printing a document again and see if the “Printer not activated, error code -30” no longer pops up.
Note: You also have the option to go directly to the website of your printer manufacturer and check if there’s a new update – if there is, download it.
You can prevent starting of app installations files if they have not come from the MS store inside Windows 11.
This can make your PC more secure because all apps in the store will have to be digitally signed and overall it can provide you with more control over what will be installed.
Follow the guide below to find out how can you easily turn this feature ON.
Press ⊞ WINDOWS + I to open Windows settings
Select Apps and then choose Apps & Features
Click on Choose where to get apps to bring a drop-down menu
Select The Microsoft Store only (Recommended)
Close settings
Settings will apply changes immediately and you continue using Windows right away.
With these settings turned ON if you want to install a downloaded application or run the installer you will not be able to, and message The app you’re trying to install isn’t a Microsoft-verified app will show on your screen.
You can always reverse this setting by choosing Anywhere in settings instead of Microsoft store only.
Wondering if upgrading to Windows 11 will boost your gaming experience? We can’t give you a straightforward answer, sadly. But we can take you through the tweaks you can expect if you have all the right requirements and help you make a final decision.
Is Windows 11 good for gaming?
Essentially, the answer to this question is yes. Microsoft has definitely added a bunch of enhancements and features to its latest OS to give gamers the best possible experience. However, you have to keep in mind that this may not work out smoothly for every single user.
Whether you’ll be able to fully take advantage of the Windows 11 gaming features really depends on your setup. As expected, Windows 11 has more demanding system requirements than its predecessor.
Credit: Florian Olivo on Unsplash
So, unless your hardware can run the new OS comfortably, you might not be able to make the most of all these gaming perks. In that case, we recommend you first upgrade your hardware and then make the switch. Be prepared to be a little surprised by a few other interesting changes in comparison to Windows 10, though!
For some of the new gaming features to work, it’ll also be necessary for you to have an NVMe SSD and an HDR-compatible monitor. So let’s take a look at 4 big improvements you can expect if your setup is compatible.
Gaming enhancements on Windows 11
1. Enjoy faster loading speed with DirectStorage
For this powerful feature to work, you need a compatible graphics card and, as stated before, an NVMe SSD. It’s also important for your GPU to support the DirectX 12 graphics API at least. And since we’re on that subject, you’ll be happy to know that Windows 11 has also introduced a new version of the API called DirectX 12 Ultimate.
Now, what does DirectStorage do? It’s a new feature designed to make full use of the speedy storage of NVMe SSDs. It also transfers game data directly onto the graphics card, lightening the load on your CPU. Normally the CPU would have to decompress the data first, but DirectStorage helps bypass this. That’s how loading times are reduced and games run more smoothly.
2. Fully immerse yourself through Game Mode
Windows 11’s Game Mode is certainly a welcomed addition. When you turn on Game Mode, usage of background apps that aren’t essential to your game is reduced. This results in the game you’re running becoming a priority process. This way, it uses your hardware and system resources to the max. Ultimately, the Game Mode means less lag and higher frame rates so you can play undisturbed and fully enjoy your gaming session.
3. Vibrant visual experience thanks to AutoHDR
For this one you’ll absolutely need an HDR-compatible monitor. Basically, HDR (High Dynamic Range) means a wider range of contrasts and colors that can be displayed on a monitor.
Windows 10 has an HDR feature, but you have to turn it on and off manually (“Use HDR”). Plus, users have reported that, if left on, it results in an unappealing appearance of content other than movies and games.
Windows 11 fixes that problem with its AutoHDR feature. Toggling it results in the system automatically adjusting the color contrast, balance and brightness based on what you’re currently looking at. For gamers, this means vivid imagery in every single game, resulting in a supreme visual experience. You can check out Microsoft’s own video showcasing the power of AutoHDR.
Aside from AutoHDR, another way Windows 11 improves the visual aspect is through its support for refresh rates of up to 360Hz.
4. Xbox Game Pass & Game Bar
It’s no secret that Microsoft wants to integrate Windows and Xbox. We’ve seen some attempts with Windows 10, but they’re pretty wonky compared to the new OS.
Windows 11’s built-in Xbox Game Bar enables quite a few options all gamers desire. You can take screenshots and videos of your game and send them, for starters. Furthermore, you can use it to see audio settings and monitor your PC’s performance without having to leave the game or open the Task Manager.
Widgets are also a really cool part of the Game Bar. You can choose from a wide variety of widgets, such as Xbox Achievements, Spotify, Gallery, Xbox Social and more.
Moreover, the Xbox Game Pass has been streamlined on Windows 11. Game Pass is a subscription service that unlocks hundreds of awesome games and supports cloud streaming. Do keep in mind that the games are only unlocked for a certain period of time, as the selection rotates once in a while.
What can you do for a better gaming experience?
Windows 11 does offer tweaks that require zero input from you. However, there are a few things you can do manually to get even more out of your new OS while gaming.
Turn off enhanced pointer precision. Most games enhance precision by default, so having this feature on might interfere with that.
Make sure to select your high performance graphics card for each game. Go to Settings > Gaming > Game Mode and tap ‘Graphics’ from the ‘Related settings’ menu. Find the game you want to adjust, click on ‘Options’ and choose your high performance graphics card to be the default setting. While there, you can also turn on ‘Hardware-accelerated GPU scheduling’ at the top.
Disable unnecessary apps and programs. As long as they aren’t essential to running your game, they might take up valuable system resources, so disable them to make space for your gaming requirements.
Check for pending updates and install them. It’s well-known that out-of-date software causes bugs, latency and crashes. The same goes for your GPU drivers.
Use the High-performance power plan (Control Panel > Power Options > Additional plans) to maximize the use of resources for the best possible performance.
Summary
Windows 11 has done quite a bit for avid gamers. We hope your setup is compatible with all these new features and you can experience these enhancements ASAP!
Error 1310 is a fairly common type of error encountered by Windows users.
Error 1310 usually generates while a user is attempting to install Adobe Photoshop or some Adobe product on Windows. The message displayed to the user usually states: ‘Error 1310. Error writing to file. Verify you have access to that directory’. Once the error message appears, the installation process will be terminated.
Solution
Error Causes
While there are different conditions that may trigger this error, most likely, they are generated because of the lack of privileges a user has on a Windows log-on.
When this happens, the operating system doesn’t allow the user to access the installation files. Another reason Error 1310 may occur is that often users attempt to log on to the system and choose the ‘Only for me’ option rather than the recommended ‘Anyone who uses this computer’.
Because of this reason, the data is locked for all the other users.
Since Error 1310 can easily disrupt your workflow on the system and may also lead to annoying consequences, it is best advised to treat it as quickly as possible.
Further Information and Manual Repair
There are different solutions to resolve these errors that are briefly listed below as follows.
First and foremost, restart the installation by logging onto your computer from the administrator account. This error will most likely disappear because there is often a lack of privileges that will trigger it. When you will log on from the admin account, you will have access privileges and such errors will be rectified.
Fix any corrupt system files that exist on your system. If the file resides in the Windows directory, this error will be generated. Check if any of your system files are corrupt or damaged. If yes, make sure you repair and return them back to their original position.
This error is sometimes caused because of incorrect registry entries. If the setup program shows errors, it is possible that it is because the system is having problems retrieving data stored in the system registry.
Another way, this error can be avoided is to run the setup in compatibility mode. Compatibility issues are a common occurrence. However, when an installation is performed in the compatibility mode, one can easily steer clear of such errors.
Implement any of the solutions listed above and protect your system against Error 1310.
If you like to travel but you do not have a navigation device and a place where you are traveling does not have internet coverage do not worry, Windows offline maps are here to help.
Traveling in today's world often requires that we have some sort of navigation system, wherever that be a dedicated navigation device, maps on your mobile phone, or something similar.
Maps on mobile-phone are nice but they drain the battery of the phone fast and being on a road might require that we have access to our phone, just in case of an emergency call, and dedicated navigation devices often cost a lot of money. Lucky for us Windows comes with a maps feature where you can check local maps and orientate with their help and even if you are in an area where you do not have internet coverage you can still use maps via offline mas mode in Windows.
This feature will require that you sacrifice little HDD space because you will need to download maps that you will need and some time preparing in order to find and download maps that you will need but in the end, it is worth it, you have a full map system completely offline and independent of the internet.
So in order to prepare all maps that you will need, follow this guide step by step and enjoy your trip.
Select Settings from the Start menu.
Click System.
Select Offline maps.
Click the + button next to "Download maps".
Select the continent where your desired country is located.
Select the region you want to download. Depending on the area, you can download a whole country or you'll have to drill down to a smaller region (for example, with Canada and the USA).
Repeat for any additional regions you want to have as offline maps. You can download more maps while other maps are currently downloading.
One of the worst problems users can encounter on their computers is Blue Screen of Death errors as some of them are quite hard to fix. One of them is the “The driver detected a controller error” Blue Screen error. It could be followed by “DeviceIdeIdeport0 OR”, “on deviceharddisk0dr0”, or “DR3” or the name of the drive or port that’s causing the problem. If you are one of the users who encountered this error, then the suggestions provided in this post would definitely help you in fixing the problem.
Option 1 – Try to disconnect and reconnect all hardware and cables
A lot of users reported that they were able to fix the problem by disconnecting and reconnecting cables and hardware like scanners, printers, cameras can help in fixing the problem. In addition, you can also boot your computer in a Clean Boot State so that you can find the problematic hardware by hit and trial method. Refer to the steps below to do so:
Log onto your PC as an administrator.
Type in MSConfig in the Start Search to open the System Configuration utility.
From there, go to the General tab and click “Selective startup”.
Clear the “Load Startup items” check box and make sure that the “Load System Services” and “Use Original boot configuration” options are checked.
Next, click the Services tab and select the “Hide All Microsoft Services” check box.
Click Disable all.
Click on Apply/OK and restart your PC. (This will put your PC into a Clean Boot State. And configure Windows to use the usual startup, just simply undo the changes.)
Option 2 – Update the device drivers
Updating the outdated device drivers in your computer can also help in fixing the problem. To do so, refer to these steps:
First, boot your computer into Safe Mode.
After that, tap the Win + R keys to launch Run.
Type in devmgmt.msc into the box and tap Enter or click OK to open the Device Manager.
After that, a list of device drivers will be displayed. From there, look for any outdated device drivers and click on each one of them.
After that, right-click on each entry of the device drivers and select the “Uninstall Device” option from the menu.
Now restart your computer.
After restarting your computer, go to the Settings app and Check for Updates in the Windows Update section.
Option 3 – Try to update the BIOS
Updating the BIOS can help you fix the ATTEMPTED_WRITE_TO_READONLY_MEMORY BSOD error but as you know, BIOS is a sensitive part of a computer. Even though it is a software component, the functioning of the hardware depends on it largely. Thus, you must be careful when modifying something in the BIOS. So if you don’t know much about it, it’s best if you skip on this option and try the other ones instead. However, if you are well-versed in navigating the BIOS, then follow the steps below.
Tap the Win + R keys to open the Run dialog box.
Next, type “msinfo32” in the field and press Enter to open System Information.
From there, you should find a search field on the bottom where you have to search for the BIOS version and then press Enter.
After that, you should see the developer and version of the BIOS installed on your PC.
Go to your manufacturer’s website and then download the latest version of BIOS on your computer.
If you are using a laptop, make sure that you keep it plugged in until you have updated the BIOS.
Now double click on the downloaded file and install the new BIOS version on your computer.
Now restart your computer to apply the changes made.
Option 4 – Try running the Blue Screen Troubleshooter
You might also want to run the Blue Screen troubleshooter. It is one of the built-in tools in Windows 10 that helps users in fixing system issues including Blue Screen errors. It can be found in the Settings Troubleshooters page. To use it, refer to these steps:
Tap the Win + I keys to open the Settings panel.
Then go to Update & Security > Troubleshoot.
From there, look for the option called “Blue Screen” on your right-hand side and then click the “Run the troubleshooter” button to run the Blue Screen Troubleshooter and then follow the next on-screen options. Note that you might have to boot your PC into Safe Mode.
Option 5 – Try running the Memory Diagnostic Tool
The Memory Diagnostic tool in windows can help resolve the “The driver detected a controller error” Blue Screen error by checking and automatically fixing any memory-based issues. To run it, refer to these steps:
Tap the Win + R keys to open Run and type mdsched.exe and hit Enter to open the Windows Memory Diagnostic Tool.
After that, it will give two options such as:
Restart now and check for problems (Recommended)
Check for problems the next time I start my computer
Once your computer has restarted, perform a basic scan or you could also go for the “Advanced” options such as “Test mix” or “Pass count”. Simply tap the F10 key to start the test.
Note: After you select your preferred option, your computer will restart and check for memory-based issues. If it finds any issues, it will automatically fix them and if there’s no issue found, then it’s most likely not a memory-based issue so you should try the other options given below.
Option 6 – Replace your motherboard
If your computer is still under warranty, you should consider replacing your computer’s motherboard in case the options given above failed to work in fixing the Blue Screen error.
If your VPN software blocks and disconnects the Internet or Wi-Fi connection as soon as it is connected, read on as this post will give you fixes to resolve the problem. This kind of issue is odd but not unheard of. Many users use VPN for privacy and security but if it causes internet connection problems, you have to pin down the root cause of the problem and fix it in order to continue browsing the internet with privacy and security.
Here are some suggestions you need to check out to resolve the issue between your VPN software and network.
Option 1 – Try installing the latest version of the TAP adapter
Since all VPN software uses a TAP adapter which is mostly from OpenVPN, you might want to download and install the TAP adapter driver to resolve the problem.
Option 2 – Run the Network Adapter Troubleshooter
Open the Search bar on your computer and type in “troubleshoot” to open the Troubleshoot settings.
Next, scroll down and select the “Network Adapter” option from the right pane.
Then click on the Run Troubleshooter” button.
After that, your computer will check for any possible errors and will pinpoint the root cause of the problem if possible.
Option 3 – Configure the client computer to use the default gateway
This kind of connection problem can occur when you configure the VPN connection as the default gateway on the remote network. In such a case, the VPN settings override the default gateway settings (TCP/IP settings). Thus, you have to configure the client computers in order to use the default gateway setting on your local network for internet traffic as well as a static route on the remote network for VPN-based traffic.
Option 4 – Try to use the Google Public DNS
You might want to change your DNS to Google Public DNS as it could help you resolve the internet connection problem caused by your VPN. To do so, follow the steps below.
The first thing you have to do is right-click on the network icon in the Taskbar and select Network and Sharing Center.
Next, click on the “Change Adapter Settings” option.
After that, search for the network connection that you are using to connect to the internet. Note that the option might be “Wireless Connection” or “Local Area Connection”.
Right-click on your network connection and click on Properties.
Then select the new window to choose the “Internet Protocol 4 (TCP/IPv4)” option.
After that, click on the Properties button and click the checkbox in the new window for the option “Use the following DNS server addresses”.
Type in “8.8.8.8” and “8.8.4.4” and click OK and exit.
Option 5 – Try checking the settings of your VPN software
If your VPN software has a built-in “kill switch” it prevents any internet usage every time there is a problem in connecting with the VPN server which explains why your internet connection is disconnected when your VPN software is connected.
In addition, you could also try to change your VPN software’s protocol since all VPNs support multiple protocols. It could be that the protocol your VPN uses is blocked so try changing to another protocol and see if it fixes the problem.
Option 6 – Update the Network Adapter drivers
You might also want to update the Network Adapter drivers by following these steps:
Tap the Win + R keys to launch the Run window and then type in the “devmgmt.msc” command and hit Enter to open the Device Manager window.
Under the Device Manager, you will see a list of drivers. From there, look for the Network Adapters and expand it.
Then right-click on each one of the Network drivers and update them all.
Restart your PC and see if it helped in fixing the BSOD error.
Note: If updating the network drivers didn’t help in fixing the “Windows could not find a driver for your network adapter” error, you can also try to uninstall the very same drivers and restart your Windows 10 PC. After that, the system itself will reinstall the drivers you just uninstalled. Alternatively, you can also download and install the drivers from the manufacturer’s website directly.
To reinstall the network adapter driver, refer to these steps:
Open the Devices Manager from the Win X Menu.
Then locate the device drivers and right-click on them to open the Properties.
After that, switch to the Driver tab and click on the Uninstall Device button.
Follow the screen option to completely uninstall it.
Finally, restart your computer. It will just reinstall the device drivers automatically.
Due to its hybrid core technology, the Alder Lake line of processors had some DRM issues with some game titles where DRM protection software detected hybrid core design switching via manager as a hack attempt and prevented the game from working properly. Over 50 titles were affected by this issue, now only 3 remain still affected but it is being worked on them so that can be also resolved.
Intel says that the remedy to the issue for these games is the scroll lock fix which can be done so by enabling Legacy Game Compatibility mode from the BIOS of your motherboard. When running the said games, you can press scroll lock to park the E-cores on Intel's Alder Lake Desktop CPUs to get rid of DRM issues.
Certain motherboard manufacturers such as MSI and Gigabyte have made this even easier through software tools with which you don't have to access the BIOS. All you need to do is select a button in the tool which works on both Windows 11 and Windows 10 operating systems and you will enable compatibility mode.
It is a device driver error that users encounter when they use Windows 2000 operating system and its later versions.
The error occurs when the connected peripheral device, upon removal using the ‘Safe Removal Hardware’ program, hangs up a problem within the process. The error prompt you then see is referred to within the operating system as error code 47.
It usually pops up on your computer screen with the following message:
Windows cannot use this hardware device because it has been prepared for "safe removal", but it has not been removed from the computer. (Code 47)
Solution
Error Causes
There are many factors responsible for the Error Code, the primary ones are listed below:
An incomplete program installation
An incomplete program uninstallation
System recovery from viruses
Corrupted Windows system registry entries
Further Information and Manual Repair
Error Code 47, like other device driver error codes, is relatively easy to solve. You can fix the error code in the following ways:
Method 1 – Reconnect the device to your computer
Unplugging and plugging the USB cable of the device into the computer is the easiest way to resolve the error.
Doing this will help refresh the system and increase the likelihood of the device driver files loading and function properly.
Method 2 – Restart your PC
Another simple method you can use to solve your PC error code is to simply restart your Windows system.
It may be that the error prompted upon connecting the device you have connected is merely a temporary problem, and upon restart, will resume functioning smoothly.
Method 3 – Manually uninstall then reinstall the device driver
If both of the above-listed methods fail to resolve the problem, you may have to resort to manually uninstalling and then reinstalling the device driver causing the problem.
This would be necessary since the remaining incomplete files due to a partial removal or installation of programs is what contributes to the error code. By uninstall and reinstalling the device driver program, it would lead to the completion of the files.
You can do this by firstly logging in as Administrator and open Device Manager. Select the device that is causing the problem and double click it and make sure that the peripheral is connected properly to the PC.
Upon opening, click on the ‘Driver’ tab and then select ‘Update Driver’. Make sure to refer to the system documentation that you received with your PC or computer to check for the motherboard details and driver specifics.
Method 4 – Use software to automatically download the driver
Manually uninstalling and reinstalling the driver will usually do the trick; however, it may be time-consuming especially when you would have to resort to your hardware user manual.
Therefore, using a program such as DriverFIX can save you a lot of time and frustration in having your device work properly on your computer.
DriverFIX, with its user-friendly approach to help you fix your PC issues, comes with an integrated database that detects which drivers you need to reconfigure within just a few seconds and downloads it automatically.
It further ensures that your drivers are installed in their entirety leaving no room for any incomplete files to remain that create Error Code 47.
It also has the added advantage of being able to backup and restores your files should there be the slightest possibility of system file damage.
Thus, registry damage can be averted by letting the software roll back the system files to an earlier healthy checkpoint. DriverFIX is the answer to fixing your PC error codes accurately and quickly.
Click here to download DriverFIX to fix Error Code 47 quickly and effectively!
It is no secret that Microsoft is trying to keep Windows relevant and that it is trying to make it as good as possible. A new Windows update will bring some interesting stuff in it which well some like it, some not so much.
Among various technical and security updates Microsoft will bring some directly visible to each user.
First
of these features will be File explorer compact mode. This feature is a sort of spacing content in file explorer giving it easier access if you are using a touch screen device. Now, this feature is somewhat strange, and altho I can understand and get behind the logic of this move I am not sure I like it. Lucky for me and others who feel the same this option can be turned off for now.
Second
feature is something I can get behind, improvements for virtual desktops. There is an article on errortools about virtual desktops feature and I really hope you are using it since it is a great feature. Anyway, new update will bring us separate desktop wallpapers for each desktop and we will be able to arrange them in order we like.
Third
thing that I would like to address is animation features. We will have windows slowly fade and resize when opened, minimized, maximized, etc. So far we are unable to tell how this can and will it affect overall system performance. I am sure it will have some impact but hopes are that it will be kept to a minimum.
If you would like to read more helpful articles and tips about various software and hardware visit errortools.com daily.


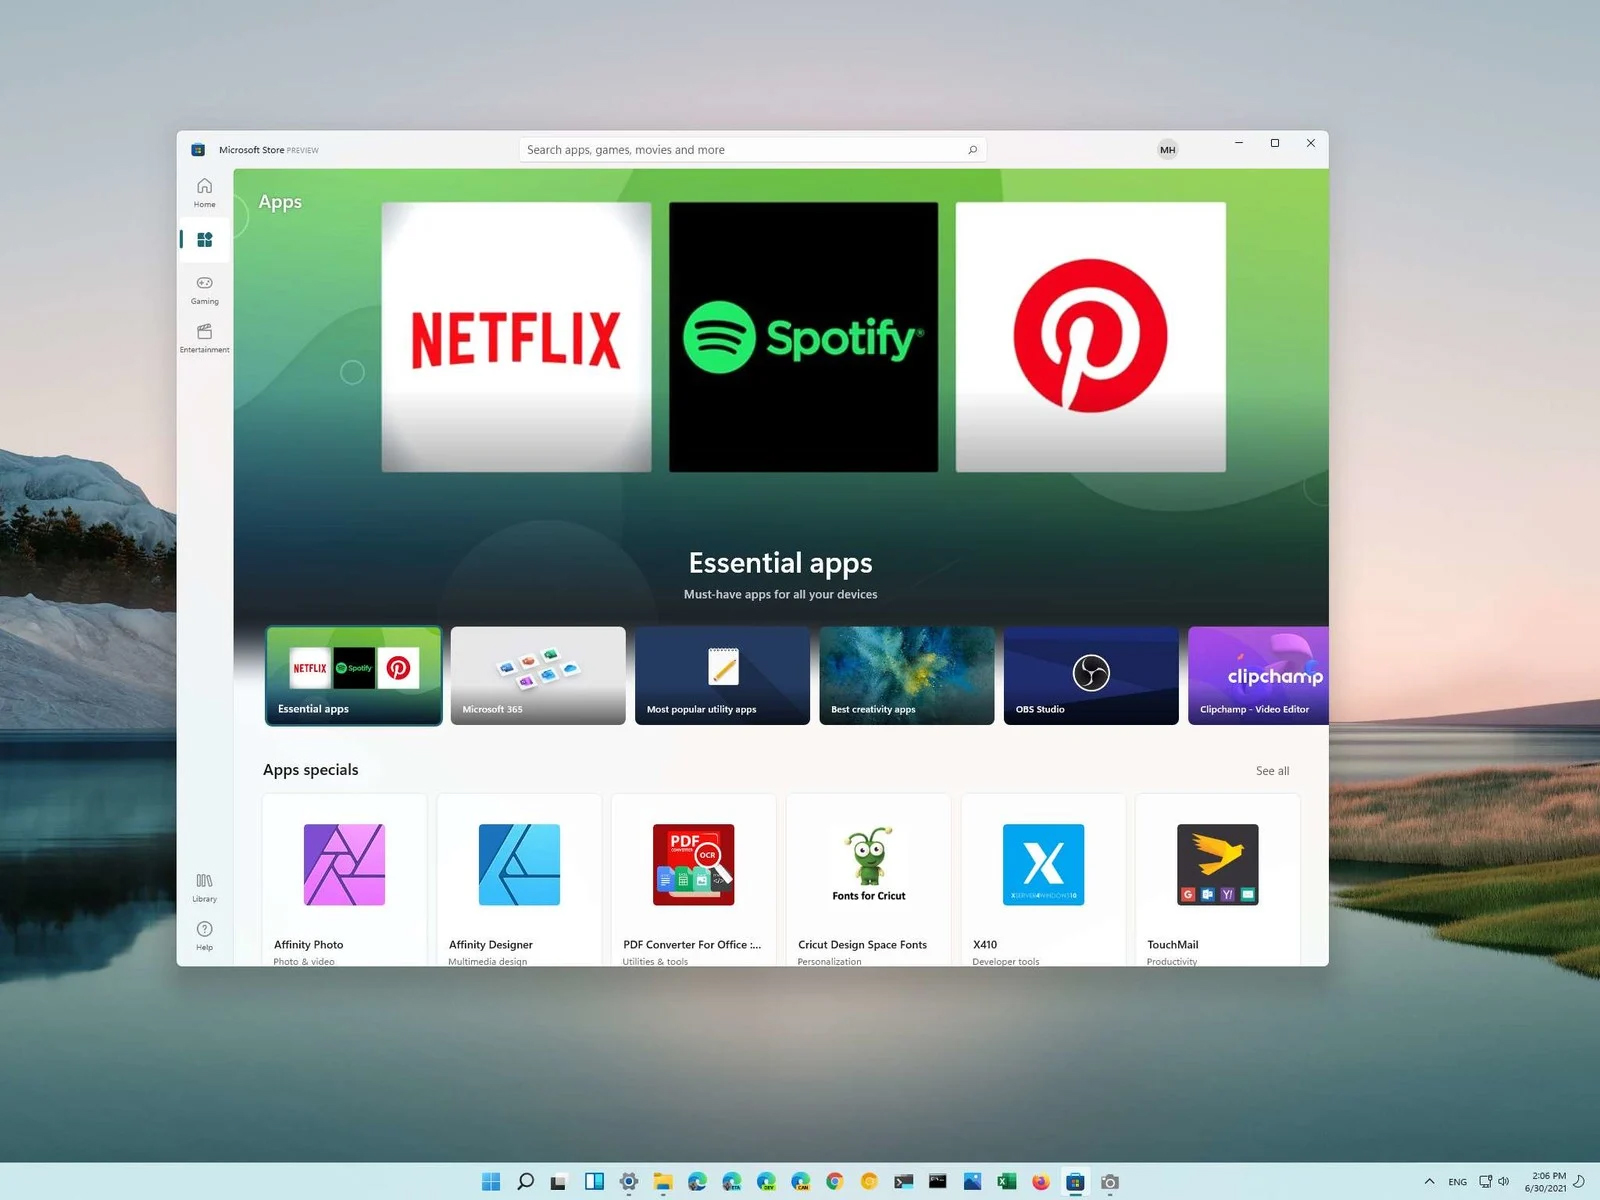 You can prevent starting of app installations files if they have not come from the MS store inside Windows 11.
This can make your PC more secure because all apps in the store will have to be digitally signed and overall it can provide you with more control over what will be installed.
Follow the guide below to find out how can you easily turn this feature ON.
You can prevent starting of app installations files if they have not come from the MS store inside Windows 11.
This can make your PC more secure because all apps in the store will have to be digitally signed and overall it can provide you with more control over what will be installed.
Follow the guide below to find out how can you easily turn this feature ON.


 Intel says that the remedy to the issue for these games is the scroll lock fix which can be done so by enabling Legacy Game Compatibility mode from the BIOS of your motherboard. When running the said games, you can press scroll lock to park the E-cores on Intel's Alder Lake Desktop CPUs to get rid of DRM issues.
Certain motherboard manufacturers such as MSI and Gigabyte have made this even easier through software tools with which you don't have to access the BIOS. All you need to do is select a button in the tool which works on both Windows 11 and Windows 10 operating systems and you will enable compatibility mode.
Intel says that the remedy to the issue for these games is the scroll lock fix which can be done so by enabling Legacy Game Compatibility mode from the BIOS of your motherboard. When running the said games, you can press scroll lock to park the E-cores on Intel's Alder Lake Desktop CPUs to get rid of DRM issues.
Certain motherboard manufacturers such as MSI and Gigabyte have made this even easier through software tools with which you don't have to access the BIOS. All you need to do is select a button in the tool which works on both Windows 11 and Windows 10 operating systems and you will enable compatibility mode. 