Logo

How to Fix the Waol.exe Error

Waol.exe Error - What is it?

Waol.exe is an executable file located in a subfolder of "C:\Program Files" - usually C:\Program Files\America Online 9.0a. Waol.exe is not a core file but it is an important part of AOL (American Online) utilities.

It ensures the AOL programs run smoothly on your system. The Waol.exe error occurs when the AOL program fails to execute and run properly.

The error message is displayed in the following format:

“Waol.exe has encountered a problem and needs to close. We are sorry for the inconvenience.’

Solution

Restoro box imageError Causes

Waol.exe error typically occurs when this executable file gets infected by a virus, Trojan, adware, or spyware. When this happens the file location also changes.

Therefore the best way to verify if your PC is under attack by malicious software is to check the Waol.exe file location on your PC. If the file is found in some other location instead of its correct disk location, then you must immediately fix this error before the damage sets it.

Malicious software like viruses and spyware are notorious for slowing down PC performance and besides they give access to hackers to break into your system and manipulate your confidential and private data saved on your PC.

This exposes you to serious privacy errors and data security dangers including identity thefts, cybercrime, and data breaches.

Furthermore, viruses can also corrupt the computer’s registry and lead to system failure and crashes.

Further Information and Manual Repair

To resolve Waol.exe error many PC users seek an antivirus.

Though this also helps resolve the issue but you should know that an antivirus has certain limitations. It is known to slow down the system speed and will only remove viruses from your PC.

This means if the virus has affected the registry of your PC, it will not resolve that, and to repair your registry you may then have to download a registry cleaner separately on your system thereby reducing the PC speed even more.

To ensure all kinds of malware are removed and registry issues resolved along with system speed optimization, it is recommended to download Restoro.

This is an advanced, innovative, and multi-functional PC repair tool deployed with a variety of powerful utilities. These include a registry cleaner and a system optimizer.

It is safe, efficient, user-friendly, and compatible with all Windows versions including Vista, XP, Windows 7, 8, 8.1, and 10. The antivirus feature embedded inside this software detects scans and removes all malicious programs infecting your PC immediately. It resolves all your system’s privacy issues and makes sure that your system is inaccessible to hackers.

Besides this, the registry cleaner removes files cluttering and damaging the registry and also restores it. With the help of the system stability detector, it detects errors causing PC slowdowns and resolves them too thereby boosting the speed of your PC dramatically.

To resolve Waol.exe error right away, click here to download Restoro today.

Do You Need Help with Your Device?

Our Team of Experts May Help
Troubleshoot.Tech Experts are There for You!
Replace damaged files
Restore performance
Free disk space
Remove Malware
Protects WEB browser
Remove Viruses
Stop PC freezing
GET HELP
Troubleshoot.Tech experts work with all versions of Microsoft Windows including Windows 11, with Android, Mac, and more.

Share this article:

You might also like

6 colors of Western Digital
I must admit that I am a big Western Digital fan, I have been using their hard drives really long time and I must admit that I am very happy with their products. Sometimes they could be a little more expensive than other drives on market but security and performance are on their side. If you ever wanted to purchase Western Digital or WD hard drives or you are considering getting one, no doubt that you have come across their color cryptic line of products. 1TB Hard drive can come in 6 different colors in your search products query and if you are not familiar with the WD color coding of hard drives you might be a little lost as to which one is right for you and what are the differences. This article is made to explain exactly that, what are WD colors representing so you can choose the right one for your needs. Western Digital has decided to use color codes in order to mark their series of disks which means that each color represents different hard drive series and it is made and aimed for different use, we are going to explore in detail each series below:

WD BLUE

Blue series is all around typical hard drive made and meant for daily use in desktop computers for all kinds of tasks. You can use it in casual gaming or for storage, its purpose is tailored for all-around casual daily users.

WD RED

WD Red HDD is designed for NAS and RAID systems. Its purpose is to be turned 24/7 who ever need access to it. Get this series if you need to have constant access to files or if you need a reliable RAID hard drive.

WD GREEN

Green series of the hard drive is manufactured for low power consumption and for storage, they are meant to be used for storage and not accessed regularly.

WD PURPLE

Purple line of hard drive products is designed solely for video surveillance systems. Instead of having a preference on reading data like WD RED, the PURPLE series is given preference on writing, constant writing to be more precise.

WD BLACK

The black series is made for an external storage medium with high performance. Due to the high performance, WD Black hard drives are much popular among photo editors and high-end gamers.

WD GOLD

WD Gold HDD provides a long-term cold storage medium. Therefore, this series of Western Digital hard drives are suitable for data centers. These hard drives can handle many sophisticated systems simultaneously and work well with different servers That's it, I hope that you have now a more clear understanding of the WD color-coding of its hard drive series. As always thank you for reading and I hope you will have a great day. If you would like to read more helpful articles and tips about various software and hardware visit errortools.com daily.
Read More
INET_E_RESOURCE_NOT_FOUND
The previous Windows versions all came with Microsoft's browser Internet Explorer. A lot of users love it because not only that it is easy to use. It is also very fast. Users didn’t have to worry about compatibility because it is almost always compatible with its Windows Version. When they introduced Windows 10, they changed the name of the browser from Internet Explorer to Microsoft Edge. It is faster and more user-friendly compared to its predecessors. But after the Creator Update, some experienced receiving the inet_e_resource_not_found error code. In contrary to what everyone expects, you actually don’t have to uninstall and reinstall the Microsoft Edge App. What you can do is reset the browser in your Apps & Features Settings in your Microsoft Settings.

To reset the browser you can follow the steps below:

  1. Click on the Windows icon and go to settings.
  2. Click on Apps and this will bring you to the Apps & Features page. Look for Microsoft Edge from the list of Apps and click on it.
  3. Choose Advance Option
  4. Scroll down then Under Reset, click on repair or reset. When you repair it will fix the existing problem but the data that caused the problem may still be present and can still cause problems. If you click on reset, it will delete all the cache and cookies that are installed in your browser but it will save your Favorites as well as your bookmarks.

Another way to resolve this is by disabling the feature TCP Fast Open on Microsoft Edge. To disable this, go ahead and follow the steps below:

  1. Open the Microsoft Edge browser.
  2. Type in about: flags on the Address (URL) bar.
  3. Under Networking, uncheck the Enable TCP Fast Open.
  4. Close your Microsoft Edge browser and open a new one.
Flushing the DNS also worked for other Users. Sometimes, the error code the inet_e_resource_not_found is caused by a corrupted DNS cache. There are 2 ways to flush your DNS. The first option is to use the command prompt to run the command.
  1. To access the Command prompt or CMD, you can search for it on Cortana or you can click on the Windows icon to access the Programs, scroll down to the Windows System folder and click on it.
  2. A dropdown menu will show up, click on Command Prompt which is the first on the list.
  3. Type in the code ipconfig /flushdns and press enter.
  4. There will be a message that will show that says Windows IP configuration successfully flushed the DNS Resolver Cache
  5. Exit the CMD by typing exit and press enter.
The easiest way to do this is to Press the keys Window + R on your keyboard. Type in ipconfig /flushdns in the search box and hit enter or click on OK. These are only some of the ways to resolve the inet_e_resource_not_found. There are other ways to further troubleshoot this issue such as reinstalling your Wifi Adapter Driver or adjusting the DNS Server Address. But most of the time, users are able to resolve the issue with the steps provided above.
Read More
Delete large System Error Reporting files
In case you don’t know, Windows contains a feedback mechanism that generates error reports from hardware and software problems. These reports are temporarily stored in the system and send them back to Microsoft so that it can find solutions to the reported problems and fix them in the upcoming updates.  However, as time goes by, these reports actually take a lot of space in your computer which is why end-users like you are free to delete them with the help of the new Free Up Space feature in Windows 10. As useful the Free Up Space feature may be, there are times when you won’t be able to use it for some reason which is why in this post, you will be guided on how to use alternative ways in deleting very large System queued Windows Error Reporting file, some of which may run in Gigabytes. Every time the Windows Error Reporting or WER sends out an error file and looks for a solution, the WER server at Microsoft sends out a solution instantly. And if the solution is under investigation or is unknown, then you will be notified about it right away and will be asked for more details. As mentioned, even though the Free Up Space feature in Settings will be able to clear the error reporting files, there are instances when it won’t be able to delete very large System queued Windows Error Reporting files. Alternatively, there is an option to delete these files using the Disk Cleanup Utility. Feel free to select which option you’d like to use to get rid of Windows Error Reporting Files.

Option 1 – Delete Windows Error Reporting Files via Settings

  • Go to Settings.
  • From there, go to System > Storage > Free Up Space and then click on it to launch it.
  • Afterward, give it some time to populate all the files and folders. Once it’s done, select “System created Windows Error Reporting files” to mark its checkbox while leaving the other options unchecked.
  • Next, click on the Remove files button to delete all the Windows Error Reporting files from your computer.

Option 2 – Manually delete the Windows Error Reporting Files

  • Tap the Win + E keys to open File Explorer.
  • Next, enable the Hidden Files view from the menu.
  • Then go to C:/ProgramData/MicrosoftWindowsWER.
  • From there, you will see various folders like LocalReportArchive, ReportArchive, ReportQueue, and Temp.
  • Open each one of the aforementioned folders and delete the archive files. Note that these files will have names similar to “00c58c1f-b836-4703-9bcf-c699ca24d285”.
Note: If you are not able to delete any of these files, you have to take ownership of the folder. To do so, refer to these steps:
  • Right-click on the folder and then select Properties.
  • Next, click on the Edit button in the Properties window and click OK to confirm if you got a User Account Control elevation request.
  • After that, select user/group from the permission windows or click on the Add button to add another user or group. It would be best if you add “Everyone” to give permission.
  • Then check “Full Control” under the “Allow” column to assign full access rights control permissions.
  • Now edit the permission to Full Control for “Everyone”.
  • Click OK to save the changes made and then exit.
On the other hand, if you do not want to go through all these troubles in deleting the Windows Error Reporting files, you can just disable it especially if it already becomes a daily annoyance as the files generate every day and their sizes are mostly gigabytes. And besides, there are times when these files do not make it to the Microsoft WER server and end up only occupying a lot of space for nothing.
Read More
A Quick Guide to Repair User32.dll Error Code

User32.dll Error Code - What is it?

User32.dll is a Dynamic Link Library file. Windows stores instructions for graphical elements such as dialog boxes and Windows in this file. This file is a crucial file, necessary to run Windows operations. If this file is damaged, deleted, or removed from the system you may not be able to run the programs on your system that use and share the User32.dll file thereby causing you inconvenience. The User32.dll file error is displayed in the following format:

“This application has failed to start because USER32.dll was not found. Reinstalling the application may fix this problem.”

Or

“[Program] illegal system DLL relocation”

Program here refers to the name of a program that caused the User32.dll error message.

Solution

Restoro box imageError Causes

User32.dll errors are triggered by the following reasons:
  • Missing and damaged .dll files
  • Viral infection
  • Registry corruption
User32.dll error is also referred to as C0000135 blue screen of death error. When the User32.dll error occurs it not only locks you out of your desired program but also turns your computer screen blue. If the error is not repaired timely it may expose your PC to serious threats such as abrupt system shutdowns, system failure, and crash.

Further Information and Manual Repair

To resolve the User32.dll error on your PC, try the following solutions:

1. Reinstall Programs Causing User32.dll errors

Sometimes User32.dll error may occur due to missing DLL files.  This happens when you delete a program from your PC and accidentally the DLL file also gets deleted which is shared by other programs on your system. Therefore to resolve this first find out what programs on your system use User32.dll to load and run on your system. To do this use the Tasklist command-line tool. It displays the names of all the programs that currently use the User32.dll file. After this, reinstall the programs that use User32.dll files on your system. This will hopefully resolve the error.

2. Install and Run Restoro

If it doesn’t, then this probably means that the damage is deep-rooted. It is related to the damaged DLL files, registry corruption, or viral infection. To resolve all of these causes in one go, it is best to download Restoro instead of downloading 3 different software to resolve each cause for the error separately. This is basically an advanced, innovative, and multi-functional PC repair tool embedded with multiple powerful utilities including a registry cleaner, and a system optimizer. It is a one-stop solution for all your PC-related problems including the User32.dll error. The registry cleaner wipes the clutter and obsolete files damaging the hard disk and simultaneously repairs the DLL files and the registry. The antivirus feature removes all the viruses on your system while the system stability utility boosts the PC speed significantly. It is safe, user-friendly, and compatible with all Windows versions including Windows Vista, XP, Windows 7, 8, 8.1, and 10. Click here to download Total System Care to resolve the User32.dll error right away.
Read More
5 Common Windows 11 Issues You Can Solve Super Quickly

It really sucks when you can’t fully enjoy the newest version of your favorite OS.

Windows 11 is still relatively fresh and consequently has some annoying little bugs that really ruin our experience. The good news is that you’re not alone and most of them are easy to fix.

Here are 5 commonly reported Windows 11 issues and what you can do to get rid of them.

1. Windows 11 audio problems

One of the absolute most irritating things in the world is struggling with the sound on your computer. Windows 11 users have reported facing the issue of low or no sound. If you’re currently experiencing the same frustration, you can be relieved. Chances are fixing it will only take a few minutes.

The first thing to check would be whether you accidentally muted your device by pressing the mute button on your keyboard. Yes, we know it sounds a lot like the old “have you tried turning it off and on again?” But it’s important to leave no stone unturned, and the most obvious things are usually the ones we easily overlook.

Moreover, if you have several audio output sources, check whether the right one is selected. You can do this via the Action Center or through Settings. If you want to use the same source every time, we also recommend you set it as the default one.

It’s also important to have a good, up-to-date audio driver. More often than not, this will be the true cause of your audio struggles. Make sure to update your driver, and if that doesn’t work out, you can always un- and reinstall it or install a different one. 

Lastly, if all attempts remain unsuccessful, run the audio troubleshooter to figure out what’s actually going wrong.

2. Unable to find files

Such a powerful new operating system, yet it can’t seem to do the simplest thing imaginable? The File Explorer not responding on Windows 11 is one of the most frustrating and most common problems with Microsoft’s newest iteration of its awesome OS.

However, 9/10 times it can be fixed by simply restarting your PC. You could also try killing the Windows Explorer process in the Task Manager and then rerunning it.

If these don’t help, check whether there are any pending Windows 11 updates. A single missing update can compromise your PC’s functionality, so always make sure to install them all on time. 

Should none of that work, then there are other ways to solve the File Explorer problem. However, then the issue is probably a bit deeper and it’s no longer in the ‘easy fix’ territory.

3. Start menu not working

Just like the File Explorer, the Start menu is a fundamental element of your OS. So, it’s only natural that its malfunction grinds your gears. It may be more customizable than on previous Windows versions, but it doesn’t always work smoothly. 

If you’re facing the so-called Start menu critical error, there are a few things this could be caused by. Usually it means you turned off your system while an important update was still being installed, there is a corrupt file on your PC, or Windows forcefully stopped a program. 

Whatever the reason, the solution should be pretty simple. Try the basic steps: restarting your File Explorer (like we explained above) and signing out and back into your account. If that doesn’t do anything, you may want to try uninstalling third-party start menu apps (if you have any), since they can interfere with your default programs’ functionality.

Now, those are the easy fixes. If you get nowhere with them, you might need to identify the root cause and search for more complex solutions than that.

4. Snipping tool not working

Our beloved screenshot tool was introduced with Windows 10 and Microsoft decided to keep it. However, you were probably just as disappointed as us when you tried to run it and failed. 

Normally, this can be fixed by installing the latest Out-of-band (OOB) update, or even pending updates in general. Even if your system appears to be up-to-date, run the checker just in case.

Another cool thing Windows 11 lets you do is ‘Repair’ and ‘Reset’, which is the easiest way to troubleshoot your Snipping tool. If this fails, you can also try the good old un- and reinstall method. Simply uninstall the tool through the Control Panel and reinstall it from the Microsoft Store.

Furthermore, in the case of an upgrade from Windows 10 to 11, it may be that the old Snipping tool version is interfering with the launch of the new one. If you don’t care that much about the additional options available with the enhanced screenshot tool, you can use the old version instead.

Simply go to your C Drive, find the Windows.old folder, search for the tool and open it from there. Make sure to pin it to your taskbar as well, if you know you’re going to use it often.

5. Can’t install the latest update

The latest Windows 11 version, 22H2, has brought tons of enhancements to our dearest operating system. Unfortunately, a lot of users still haven’t had the opportunity to experience it. A mere update of your OS version should be the one thing that goes smoothly, but sometimes that’s not the case.

Failure to install 22H2 can be caused by a few things. Most commonly, the issue is caused by lack of storage space or corrupted files, but there could be other culprits.

There are a couple of things you could try. For example, it’s crucial that your drivers be up-to-date and some important services be enabled. These are: Windows Modules Installer, Background Intelligent Transfer Service, Cryptographic Service, Windows Update services.

To enable them, search ‘Services’, find the service you need and right-click on it. Open ‘Properties’ and select the startup type ‘Automatic’.

It may also be necessary to unplug all peripherals that aren’t crucial and disable third-party antivirus tools until after the update is finished. 

Ultimately, you can run the Windows Update troubleshooter to detect and fix other possible issues.

Summary

Tiny bugs like these are nothing out of the ordinary. That said, we still all hate when they happen.

Hopefully some of our solutions have helped you to a smoother Windows 11 experience. But if you’re still struggling, feel free to reach out to us. We’d be happy to help!

Read More
Easy Remove PCPerformer From Windows

PC Performer is a registry cleaner made by PerformerSoft. The purpose of this program is to remove redundant items from the Windows registry. Registry cleaners remove broken links, missing references within the Windows registry. PC performer is designed to automatically optimize your registry and clean it up.

PC Performer adds registry entries for the current user that allow it to run automatically each time the system is rebooted. It adds a scheduled task to Windows Task Scheduler in order to run at various times. The software connects to the internet, therefore it creates a Windows Firewall exception that allows it to connect without interference. Multiple anti-virus programs detected this software as Malware, it typically comes bundled with other software or is distributed through a pay-per-install bundle.

About Potentially Unwanted Applications

People have encountered it – you download and install a piece of free software application, you then see some unwanted applications on your computer or discover a strange toolbar has been added to your browser. You didn’t install them, so how did they turn up? These unwanted programs, technically known as Potentially Unwanted Programs (PUPs), often come bundled along with other software and install themselves on user’s PC without their knowledge. They perhaps might not look like viruses to some individuals, but they can produce major annoyances and bring about serious trouble for users. The idea of PUP was coined to define this downloadable crapware as something other than malicious software. Much like malware, PUPs create problems when downloaded and placed on your computer, but what makes a PUP different is that you provide consent to download it – the fact is vastly different – the software installation bundle actually tricks you into agreeing to the installation. Still, there isn’t any doubt that PUPs are still bad news for computer users as they can be incredibly damaging to your computer in lots of ways.

What do PUPs look like?

The unwanted software programs after installation display loads of annoying pop-up adverts, create fake alerts, and quite often it even pushes the user to buy the software. Likewise, the majority of free software applications these days come with quite a few unwanted add-ons; in most cases a web browser toolbar or browser modification such as a homepage hijacker. Not only they needlessly use up space on your screen, but toolbars can also manipulate search engine results, watch your browsing activities, decrease your web browser’s performance, and decelerate your net connection to a crawl. PUPs employ aggressive distribution techniques to get in your computer. Some might include information gathering program code that could collect and send your private information back to third parties. Due to this unwanted program, your application may freeze, your security protections may get disabled that might leave the computer susceptible, your system may get ruined, and the list goes on and on.

Tips on how to prevent ‘crapware’

• Read cautiously before agreeing to the license agreement as it may have a clause about PUPs. • Usually, when setting up a program you will get two options, ‘Standard Installation (recommended)’ and ‘Custom Installation’. Don’t select ‘Standard’ as PUPs could be installed that way! • Use good anti-malware software. Try Safebytes Anti-Malware which will find PUPs and handle them as malware by flagging them for removal. • Be alert when you install freeware, open-source software, or shareware. Avoid downloading browser extensions and programs you are not familiar with. • Only download applications from the original providers’ sites. Avoid download portals as they use their own download manager to pack additional programs with the initial download.

What you can do if Virus Stops You From Downloading Or Installing Anything?

Malware could potentially cause several kinds of damage to computer systems, networks, and data. Certain malware goes to great lengths to stop you from installing anything on your PC, especially antivirus applications. If you’re reading this right now, you have perhaps recognized that a malware infection is a reason for your blocked web traffic. So what to do if you need to install an antivirus program like Safebytes? There are a few actions you can take to get around this problem.

Eliminate malware in Safe Mode

If the virus is set to load automatically when Microsoft Windows starts, getting into Safe Mode could very well block the attempt. Since just the bare minimum programs and services start-up in safe mode, there are hardly any reasons for issues to happen. The following are the steps you should follow to remove malware in Safemode. 1) At power on/start-up, hit the F8 key in 1-second intervals. This will bring up the Advanced Boot Options menu. 2) Select Safe Mode with Networking using arrow keys and hit ENTER. 3) Once you get into this mode, you should have an internet connection again. Now, obtain the malware removal application you need by using the browser. To install the software, follow the directions in the installation wizard. 4) After installation, do a complete scan and let the software delete the threats it detects.

Switch to an alternate browser

Web-based viruses can be environment-specific, targeting a particular web browser or attacking particular versions of the browser. The best solution to overcome this issue is to opt for a browser that is well known for its security features. Firefox contains built-in Phishing and Malware Protection to keep you safe online.

Install and run anti-virus from a USB drive

To successfully eliminate the malware, you will need to approach the issue of installing an anti-virus program on the infected PC from a different angle. Adopt these measures to employ a USB flash drive to fix your corrupted computer. 1) Use another virus-free computer to download Safebytes Anti-Malware. 2) Insert the pen drive into the clean computer. 3) Double-click the Setup icon of the antivirus program to run the Installation Wizard. 4) When asked, choose the location of the pen drive as the place where you would like to put the software files. Follow the on-screen instructions to complete the installation process. 5) Now, insert the pen drive into the infected computer. 6) Double-click the EXE file to open the Safebytes program right from the flash drive. 7) Click “Scan Now” to run a scan on the infected computer for malware.

Highlights of SafeBytes Anti-Malware

Do you want to install the best anti-malware software program for your computer system? There are various applications in the market that comes in paid and free versions for Microsoft Windows systems. A few of them are great and some are scamware applications that pretend as legit anti-malware software waiting around to wreak havoc on your computer. While looking for anti-malware software, select one which gives dependable, efficient, and full protection against all known computer viruses and malware. On the list of recommended software is SafeBytes Anti-Malware. SafeBytes carries a really good track record of top-quality service, and clients are happy with it. SafeBytes anti-malware is a highly effective and easy-to-use protection tool that is suitable for users of all levels of computer literacy. With its cutting-edge technology, this application will let you remove multiples types of malware which include viruses, worms, PUPs, trojans, ransomware, adware, and browser hijackers. SafeBytes anti-malware provides an array of advanced features which sets it apart from all others. Listed here are a few of the great ones: Anti-Malware Protection: Built on a highly acclaimed anti-virus engine, this malware removal tool is able to detect and remove many obstinate malware threats such as browser hijackers, potentially unwanted programs, and ransomware that other typical anti-virus programs will miss. Real-time Active Protection: SafeBytes offers an entirely hands-free real-time protection that is set to check, prevent and remove all threats at its first encounter. It’ll check your PC for suspicious activity continuously and shields your PC from unauthorized access. Faster Scan: SafeBytes’s virus scan engine is one of the quickest and most efficient in the industry. Its targeted scanning seriously increases the catch rate for malware that is embedded in various computer files. Safe Browsing: Safebytes assigns all sites a unique safety ranking that helps you to have an idea of whether the webpage you’re going to visit is safe to view or known to be a phishing site. Low CPU Usage: SafeBytes is renowned for its minimal influence on processing power and great detection rate of countless threats. It runs silently and efficiently in the background so you’re free to use your computer at full power all the time. 24/7 Customer Support: SafeBytes provides 24/7 technical support, automatic maintenance, and software upgrades for the best user experience.

Technical Details and Manual Removal (Advanced Users)

If you wish to manually remove PCPerformer without the use of an automated tool, it may be possible to do so by removing the program from the Windows Add/Remove Programs menu, or in cases of browser extensions, going to the browsers AddOn/Extension manager and removing it. You will likely also want to reset your browser. To ensure the complete removal, manually check your hard drive and registry for all of the following and remove or reset the values accordingly. Please note that this is for advanced users only and may be difficult, with incorrect file removal causing additional PC errors. In addition, some malware is capable of replicating or preventing deletion. Doing this in Safe Mode is advised.

The following files, folders, and registry entries are created or modified by PCPerformer

Files: File at LOCALAPPDATAPCPerformerSetupPCPerformerSetup.exe. File at PROGRAMFILESPC PerformerPCPerformer.exe. File at PROGRAMFILESPC PerformerPSCheckUp.exe. File at PROGRAMFILESPC PerformerRegistryDefrag.exe. File at WINDIRTasksPC Performer Daily Check.job. File at WINDIRTasksPC Performer Scheduled Scan.job. Registry: Key PC Performer at HKEY_CURRENT_USERSoftwarePerformerSoft. Key PC Performer at HKEY_LOCAL_MACHINESOFTWAREPerformerSoft. Key PCPerformer_is1 at HKEY_LOCAL_MACHINESoftwareMicrosoftWindowsCurrentVersionUninstall.
Read More
Firefox shows wrong or no bookmark favicon
If you have just updated your Mozilla Firefox browser as of late and you noticed that it’s showing wrong or no bookmark favicon at all, then read on as this post will provide you with potential solutions that can help you resolve the problem. The basic thing you can do to fix it is to either refresh or reset the cache for favicon and then force restart the favicon service. However, if you’ve already tried this and it didn’t work, then there are still other options you can try. You can try to rebuild the configuration file for the favicon or restart the favicon service. You could also try disabling all the add-ons on your browser or scan your computer for adware. For more details, refer to each one of the options laid out below.

Option 1 – Try to rebuild the favicon configuration file

Mozilla Firefox actually creates a file each time you bookmark a webpage and this is called “favicons.SQLite”. This file is located on your computer and for you to fix the issue in Firefox, you need to rebuild this file and in order to do that, follow these steps:
  • First, you need to unhide the hidden files in your computer by enabling the “Show hidden files” option so that you’ll be able to see the hidden files in your computer.
  • After that, navigate to this path: C:Usersyour_usernameAppDataLocalMozillaFirefoxProfilesyour_profile_name
  • From there, you need to find the “favicons.SQLite” file and once you found it, delete it.
  • Next, you have to open the Firefox browser and create the same favicon configuration file which should be automatically created.
  • Now check if you can now see bookmark favicons on your Firefox browser or not.

Option 2 – Try to restart the favicon service

If the first option didn’t work, you can try to restart the favicon service instead. Restarting the favicon service can help if you do not see the correct bookmark favicon on your Firefox browser. To restart this service, follow the steps below.
  • You need to first open the Firefox browser and in the address bar, type “about:config” and tap Enter.
  • After that, you will see a page that displays a warning message. On that page, you need to click the “I accept the risk!” button to proceed.
  • Next, using the search box on the page, look for the “devtools.chrome.enabled” option. The value for this option should be set to “False” by default.
  • Double click on this option to set its value to “True”.
  • Once done, go to Menu > Web Developer > Browser Console or you could also tap the Ctrl + Shift + J keys, alternatively.
  • Afterwards, paste this command in the pop-up window that appears and then tap the Enter button: var fS = Components.classes["@mozilla.org/browser/favicon-service;1"] .getService(Components.interfaces.nsIFaviconService); fS.expireAllFavicons();
  • Once you’re done, restart your Firefox browser to check if it fixes the problem or not.

Option 3 – Try to disable all the add-ons in Firefox

The next option you can try to fix the problem is to disable all the installed add-ons in Firefox. More often than not, add-ons can cause issues in the browser so it is possible that one of the add-ons in Firefox is causing it to show incorrect or no bookmark favicon. To resolve this problem, you have to disable all the add-ons by opening Firefox and then going to Menu > Add-ons or you could also tap the Ctrl + Shift + A keys. After that, go to the Extensions section and click on the respective Disable buttons for each one of the add-ons. Once done, restart your computer and check if you can now see the bookmark favicons or not.

Option 4 – Try scanning your computer using Windows Defender

It is possible that the bookmark favicon problem is caused by some adware in the Firefox browser so you have to scan your computer to check by using security programs like Windows Defender.
  • Tap the Win + I keys to open Update & Security.
  • Then click on the Windows Security option and open Windows Defender Security Center.
  • Next, click on Virus & threat protection > Run a new advanced scan.
  • Now make sure that Full Scan is selected from the menu and then click the Scan Now button to get started.
Read More
Raptor Lake is promising much

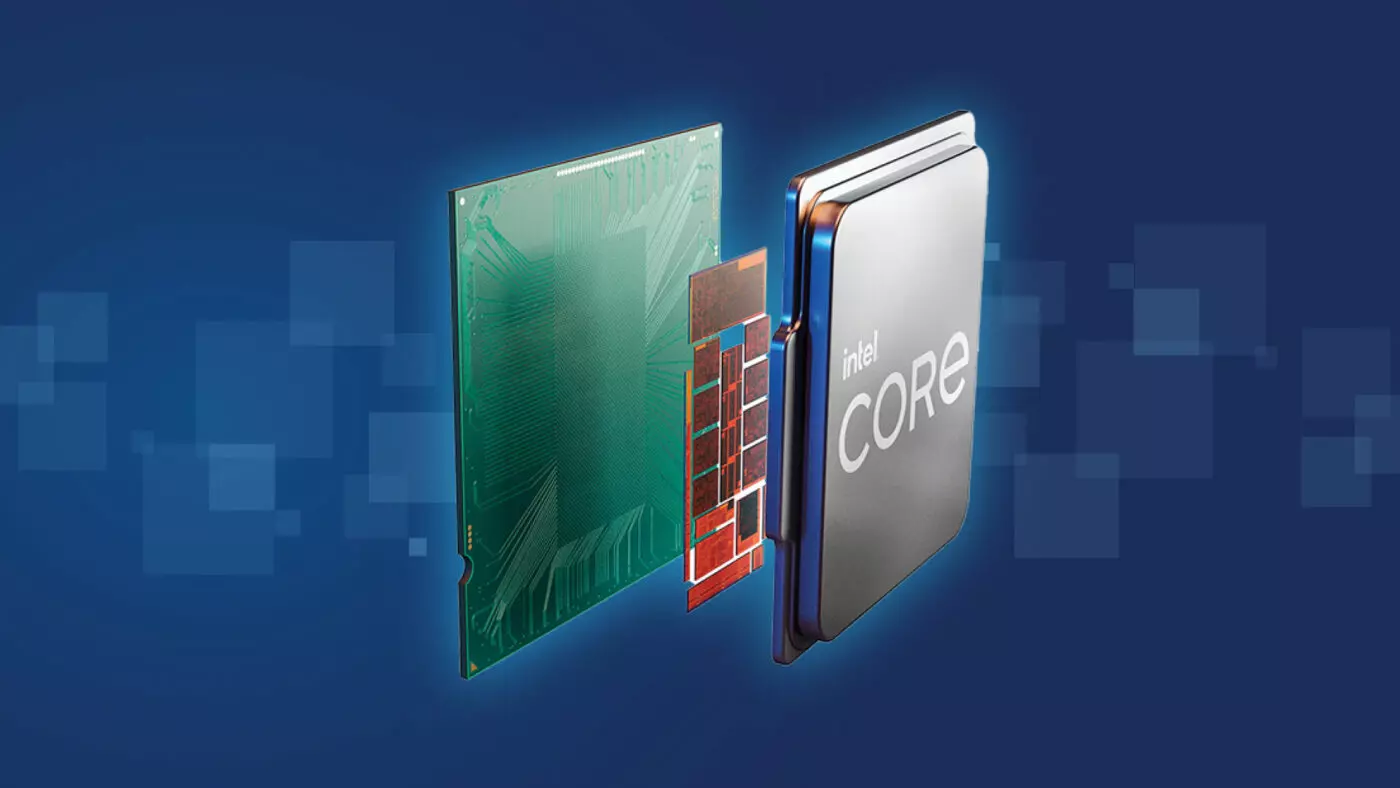
Raptor Lake, a new and upcoming Intel 13th generation CPU will break the 6GHz barrier for the first time ever in normal working mode, overclocked mode in Intel words will go as high as 8GHz. CPU will be 15% faster than Alder lake in single-threaded tasks and a stunning 41% faster in multi-threaded workloads.

The current world record for overclocking is 8.72GHz done with AMD FX-8370 and Intel is aiming at breaking that record with Raptor Lake, of course, this kind of extreme overclocking will require some top-of-the-line nitrogen cooling systems.

raptor lake

Raptor Lake will run on the current LGA 1700 socket, so you will not need to buy another motherboard for CPU and they will also be manufactured on a 10nm process which means that you will need to take care of cooling and power supply if they really go over 6GHz.

Mid-range Intel Core i5-13600K processor will come with 14 cores inside and 20 threads running at a maximum P-core frequency of 5.1GHz, while Core i7-13700K will have 16 cores and 24 threads and run on 5.3GHz max P-core frequency. Best i9-13900K will come packed with 24 cores, 8 of them will be P-cores, and the rest 16 are E-cores, and 32 threads. It will reach 5.4GHz frequency but it was stated it can go to 5.8GHz with Thermal Velocity Boost.

After this statement, we can clearly see that the 6GHz breaker CPU will probably be an i9 special KS variant. In other words, specially tested and picked existing i9 running at higher speeds as was with Alder Lake as well where normal i9-12900K ran at 5.2GHz while i9-12900KS was running at 5.5GHz.

Read More
RAC Manager not working, Error 0xc0000005
If the Diagnostic Data level in your Windows 10 computer is configured manually to the non-default security setting of zero and you’ve encountered an error code of 0xc0000005, read on as this post will guide you in fixing the problem with the Remote Access Connection Manager Service. In relation to error 0xc0000005, you might also encounter an error in the Application section of Windows Logs in the Event Viewer, along with the Event ID 1000 which would most likely have a reference of “svchost.exe_RasMan” and “rasman.dll”. Before you troubleshoot the problem, keep in mind that the Remote Access Connection Manager or RasMan service is the one that manages dial-up and VPN connections from the computer to the internet as well as other remote networks. Each time you connect, the Services dials the connection or sends out a request for a VPN connection. However, the error 0xc0000005, only occurs when a VPN profile is configured as “Always On VPN or “AOVPN” connection with or without a device tunnel. There are several options you can check out to resolve this error, you can try to install the KB Update 4505903 or fix it via Group Policy. You could also try to enable Telemetry from the Settings app or enable it via Registry Editor. For more information, make sure to check out the provided options below.

Option 1 – Try installing the KB Update 4505903

The first thing you can do to fix the problem is to make sure that you’ve already installed the KB Update 4505903 in your computer. If not, then you have to go to Settings > Update & Security > Windows Update and from there select the Check for updates link. You need to get the standalone package if you are using the Microsoft Update Catalog to update your computer and for that, you have to the website of the Microsoft Update Catalog. On the other hand, if you are using the Windows Server Update Services or WSUS, then you can just manually import the KB Update 4505903 into WSUS.

Option 2 – Try to enable Telemetry in the Group Policy and run the RASMAN service

The next thing you can do to fix the problem is to enable Telemetry via Group Policy and then run the RASMAN service. To do that, follow these steps:
  • Tap the Win + R keys to open the Run dialog box and type “gpedit.msc” in the field and hit Enter to open the Group Policy Editor.
  • Next, navigate to Computer Configuration > Administrative Templates > Windows Components > Data Collection and Preview Builds > Allow Telemetry.
  • After that, open the policy and select one of the security levels like Basic, Enhanced, and Full.
  • Then click on the Apply and OK buttons to save the changes made and close the Group Policy Editor.
  • Once one, open the Run dialog box again and type “services.msc” in the field, and hit Enter to open the Windows Services Manager.
  • From there, look for the Remote Access Connection Manager Service and restart it. And then check if it resolved the problem or not...

Option 3 – Try enabling Telemetry via Settings

  • Tap the Win + I keys to open the Settings app.
  • Next, go to Privacy > Diagnostics and Feedback and select Basic or Enhanced under the Diagnostic data.
  • After that, tap the Win + R keys to launch Run and type “services.msc” in the field, and hit Enter to open the Services Manager.
  • From there, look for the Remote Access Connection Manager Service and restart it.

Option 4 – Try to enable Telemetry via Registry Editor

  • Launch the Run utility and type “regedit” in the field and tap Enter to open the Registry Editor.
  • Then navigate to this path: HKEY_LOCAL_MACHINESOFTWAREPoliciesMicrosoftWindowsDataCollection
  • From this path, look for “AllowTelemetry” and double click on it.
  • Now enter the values, 1, 2, 3 for Basic, Enhanced, Full, respectively.
  • If you can’t find AllowTelemetry, then just create a DWORD (32-bit) and name it “AllowTelemetry” and edit its value.
  • Once done, exit the Registry Editor and restart the Remote Access Connection Manager Service from the Services Manager.
Read More
How to Fix Runtime Error 339

What is Runtime Error 339?

Runtime Error 339 is a common error code format that appears when a computer overloads with too much data. However, in some cases, it may occur due to the missing registry keys, DLL files, or during installation. It may lead some programs to shut down all of a sudden and may also corrupt files on the system.

Solution

Download Available to Completely Repair Runtime Error 339

Restoro box imageError Causes

This error code is alarming as it is a critical sign of an unstable system followed by improper maintenance of the computer. The potential risks associated with the Runtime Error 339 include:
  • System startup issues
  • Slow PC performance
  • System crash and failure
  • System file corruption
Therefore, to avoid these risks and system failure, it is advisable to fix the runtime error 339 immediately.

Further Information and Manual Repair

If you have a Runtime Error 339 issue on your computer, here is a great way how you can fix it right away:

Scan For Viruses

Improper maintenance of the computer indicates that your system might be exposed to viruses and malware. Viruses can modify the Windows registry and lead to Runtime Error 339. Therefore, first, it is important to scan for viruses on your PC.

Identify Software that Causes Errors

Scanning will help you identify software that produces this error on your PC. Once you identify them, either uninstall them or update the program. To uninstall the program, go to the Control Panel and then click on the Add/Remove program if you have Windows XP, if not then click on the Programs and Features item. Now delete the program from your system.

Obtain the Latest Version of the Installer and Re-install the Deleted Program

Once you get your hands on the latest version of the installer, run it on your system by following the on-screen instructions. Install the program. There is also another way to fix Runtime Error 339 and that is by downloading the Runtime Error tool.

Use a Professional Runtime Error Fixer Tool

To fix the error you can also use a professional Runtime Error fixer tool to scan for viruses on your PC. It is available for free download here. Download the tool and install it on your computer. Simply scan your PC after installation. Click the repair button once the scan is complete. This tool fixes problems in just a few minutes.
Read More
1 2 3 171
Logo
Copyright © 2023, ErrorTools. All Rights Reserved
Trademark: Microsoft Windows logos are registered trademarks of Microsoft. Disclaimer: ErrorTools.com is not affiliated with Microsoft, nor claims direct affiliation.
The information on this page is provided for information purposes only.
DMCA.com Protection Status