MSASCui.exe is a digitally signed file from Microsoft located in folder C:\Program Files\Windows Defender.
It is a component of Microsoft Windows Defender Antispyware. This file is responsible for performing spyware scans. It is already installed in Windows Vista operating system. MSASCui.exe becomes an error code when it is found in another path. It is categorized as a Windows runtime error.
Solution
Error Causes
The cause of MSASCui.exe error is triggered by:
Corrupt or damaged registry entries
Virus Infection
The potential risks of MSASCui.exe error are:
Slow PC performance
Data loss
When this file becomes an error, it will display messages like:
“This application has failed to start to run on Windows because MSASCUI.exe cannot be found.”
“Windows Defender cannot work properly and protect the Windows system effectively”
The message will keep popping up on your computer screen time and again.
Further Information and Manual Repair
When you experience an MSASCui.exe error on your PC, it is advisable to fix and repair it immediately before it causes serious damages to your system.
Here are some DIY quick solutions to repair MSASCui.exe error:
Solution 1:
If the speed of your PC reduces significantly and you also see MSASCui.exe error message pop on your screen, then in this case it is advisable to uninstall the Windows Defender program from your PC.
To do so, follow these instructions:
First, open the Windows Task Manager by pressing the “Ctrl, “Alt” and “Delete” keys on the keyboard.
Now click the ‘Processes’ tab. This will show the currently running processes on your system.
Scroll down and click on “MSASCui.exe” and then end the process. This will stop the program from running on your PC.
After this go to the start menu and double click on ‘My Computer’ and click on the C drive.
Choose the option ‘Program Files’ and then click on the ‘Windows Defender’ folder.
Now to delete this folder, right-click and select ‘delete’. This will uninstall the program, fix the MSASCui.exe error, and also improve the performance of your PC.
Solution 2:
If you find the MSASCui.exe file located in some other path, then this is an indication of a virus.
In this case, it is recommended to run an antivirus program on your PC to scan and delete all viruses.
If you don’t have an antivirus program already installed on your system, then you should download it. Once antivirus software is downloaded, simply run it to scan viruses and then click on delete to remove all the viruses on your system.
This will help you resolve the MSASCui.exe error caused by malware on your PC right away.
VSSControl: 2147467259 Backup jobs failed. Cannot create a shadow copy of the volumes containing the writer’s data. VSS asynchronous operation is not completed. Code: [0x8004231f]
This message pops up when you are creating a snapshot system restore, usually, the issue is tied with insufficient space or service stopping. We will go into detail about how to fix both so you can finish the operation without any issue.
Check Volume Shadow Copy Services
Easier and faster fix than the next one. Launch Services from the Start Menu, look for Volume Shadow Copy, double-click on it, and check the Service status. If it is stopped, click on the Start button. If it’s running, restart it by clicking Stop > Start.
Increase Shadow Storage Space
If the first fix didn’t resolve the issue then you need to increase Shadow Storage Space. Launch Command Prompt as an administrator. Now, type the following command to check your Shadow Storage Space.
vssadmin list shadowstorage
Now, type the following command to allocate more storage (you can change 10GB with the amount of space you want to allocate)
vssadmin resize shadowstorage /For=C: /On=C: /MaxSize=10GB
There are many times when you have to change the ownership of a folder or a file so that other users can use them as well or if you want to transfer files to them, or an old account has been removed and all the files need to be assigned to a new user. Windows 10 keeps all these files locked under the account by default which created a folder or file. So unless a user is an admin or if the file belongs to that particular user, other users won’t be able to access or edit the file. So if you want to change the ownership of a folder or a file, then you’ve come to the right place as this post will guide you on how exactly you can do that.
To get started, make sure to follow the instructions provided below carefully.
Step 1: First, you need to open File Explorer by tapping the Win + E keys. Once you’ve opened it, navigate to the folder or file that you want to change the ownership.
Step 2: Right-click on the folder or file and click on Properties and then go to the Security tab.
Step 3: From there, click on the Advanced button located at the bottom right part of the window to open the Advanced Security Settings of the folder or file.
Step 4: As you can see, the current owner will be listed with the Change link available next to the “Owner” label. Now click on this link to open the Select User or Group window.
Step 5: After that, click on the Advanced button once again and click on the “Find Now” button to see the list of all the users as well as groups that are available in the computer.
Step 6: Then select the user you want to give ownership to and click on the OK button and then click the OK button once more to save the changes made.
Step 7: This will take you back to the Advanced Security Settings window but this time, the owner will be changed to whoever user you’ve selected. But you’re not done yet as you still have to check two additional options to help you completely transfer the ownership of the sub-folders as well as the files. You have to check the checkbox of the following options:
Replace owner on sub-containers and objects
Replace all child permission entries with inheritable permission entries from the object.
Step 8: After that, you need to click the Apply and OK buttons to confirm and save the changes made. This will completely transfer the ownership of the file. However, there is still one last thing you have to do – you have to go back to the Advanced Security Settings window to remove the access of any other user on the folder or file. Once you’re there, remove the existing user to make sure that the only assigned user has the access to the folder or file.
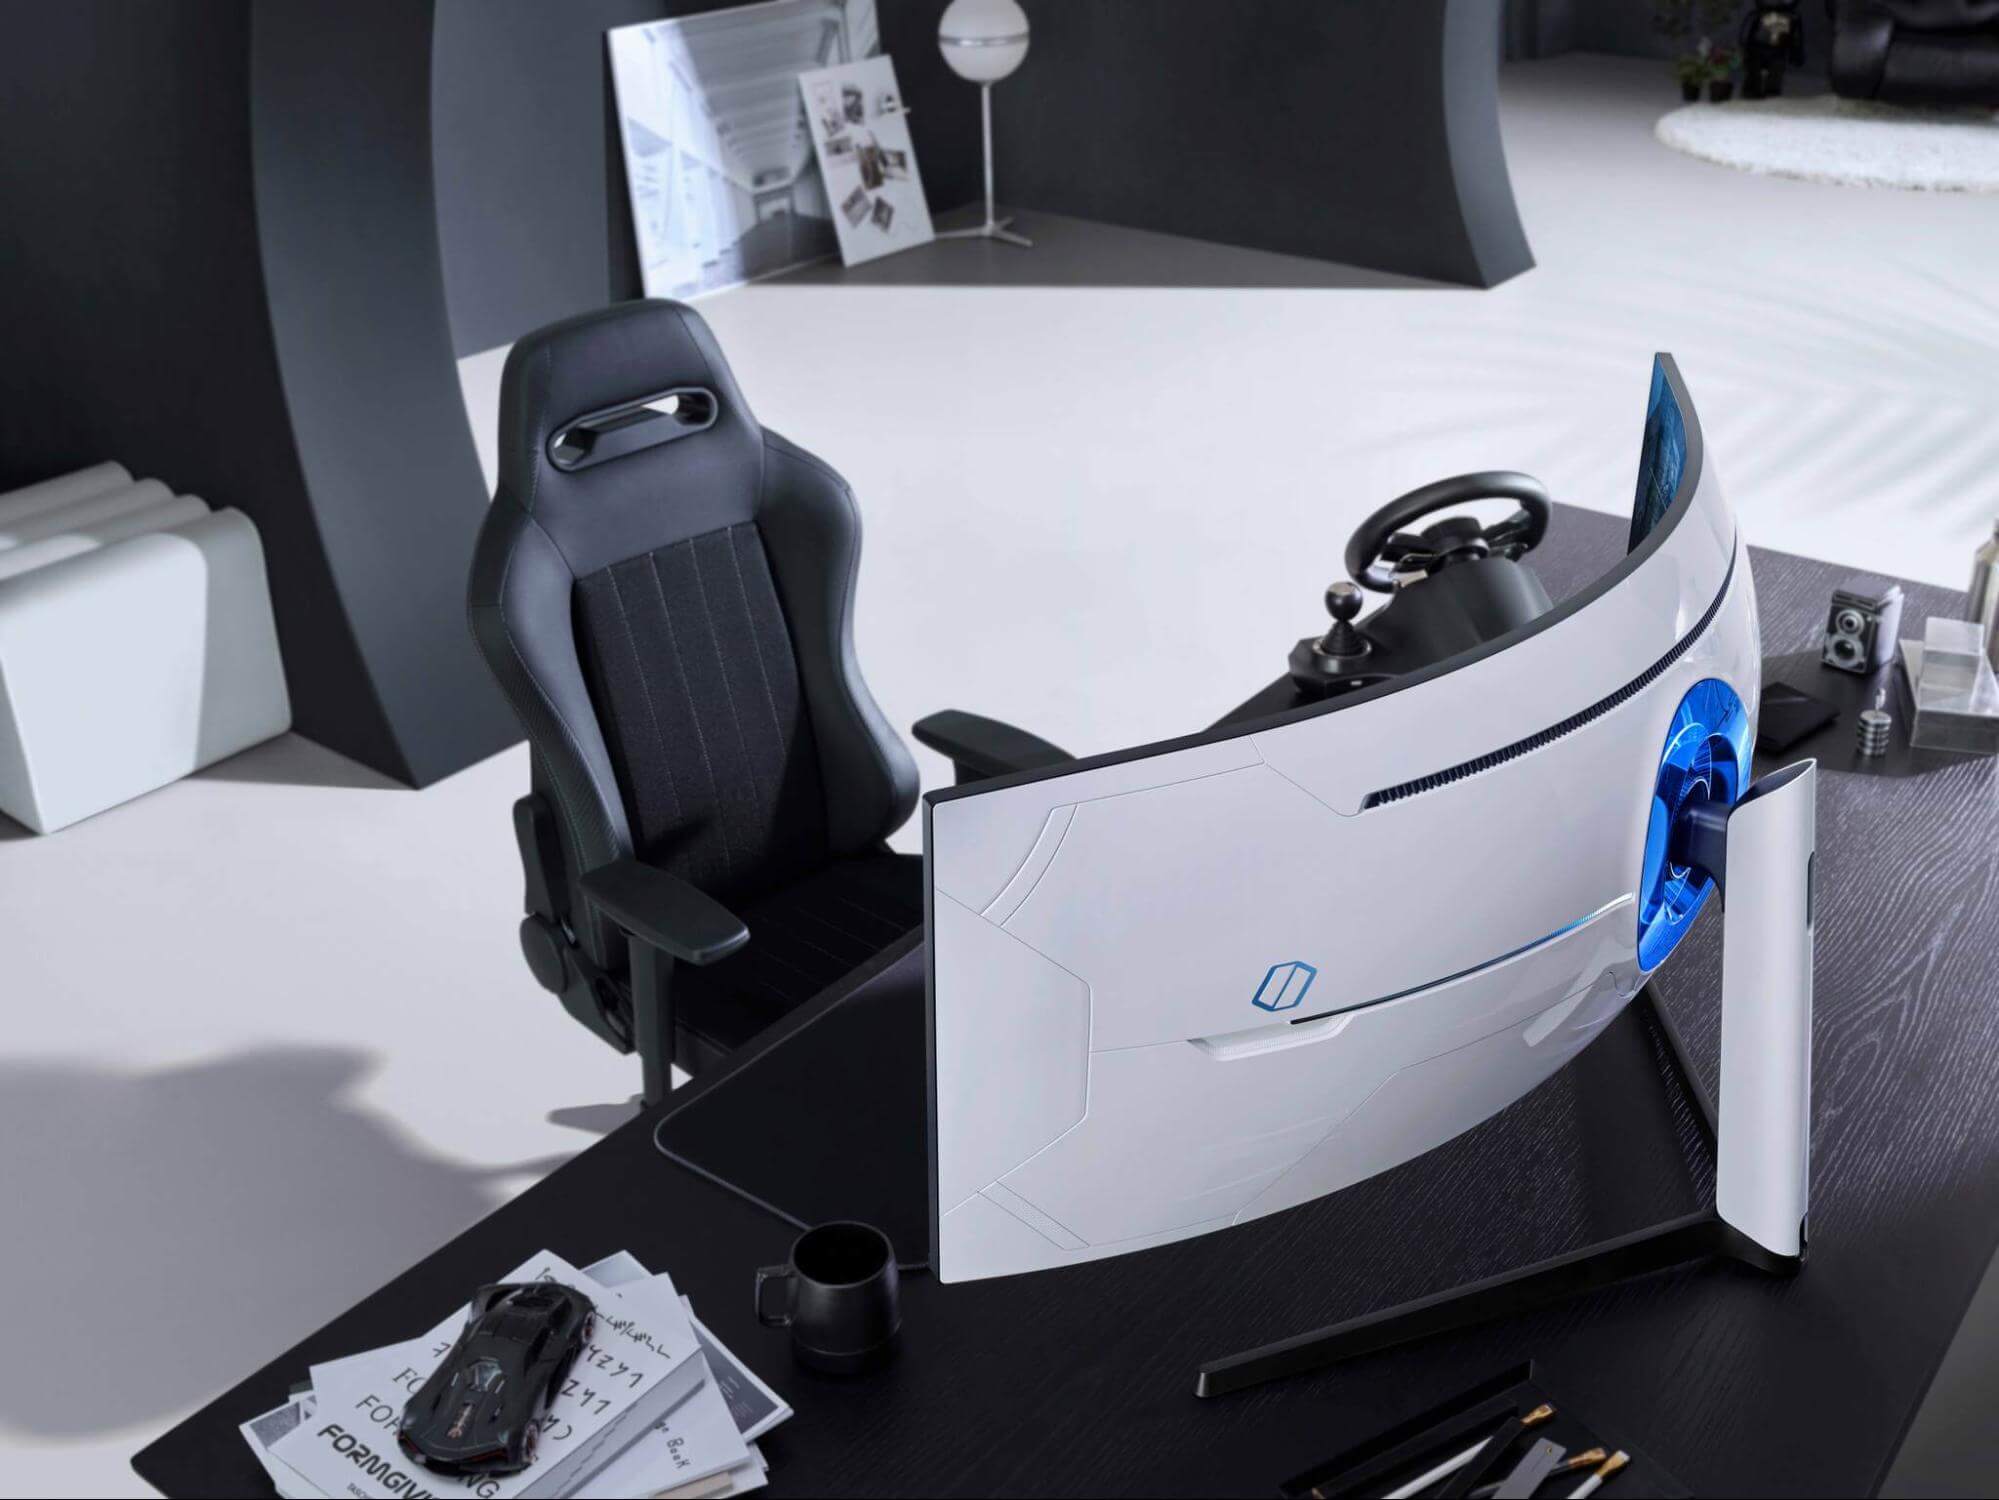
Odyssey Neo G9 is a successor to Odyssey G9 curved gaming monitor and it is aimed again at the gaming community with its specifications but of course, it can be used for work as well.
Gapping at a stunning $2500 USD price it is not really a cheap piece of hardware so it is normal to see what do you get for this kind of price and do features justify it, so let’s dive in.
Size and resolution
The first thing that you can notice about the screen is that it is big and curved, 49 inches big which is pretty big, and with it, I believe you can forget about using 2 or 3 screens because this single one will cover everything you need really.
Going as far as 5120 X 1440 resolution is the strange definition, basically, this is 5K which is kind of nice but I do not see the advantage. Sure it is larger than 4K, but for the price of $2500 I expected an 8K monstrosity so if the resolution is not the main price justification then what is? Let’s move on and find out.
Odyssey tech specs
The monitor comes with HDR and 240Hz refresh rate which is very nice and coupled with 1ms pixel response time, adaptive sync, and Variable Refresh Rate you get pretty good other tech specs.
All of this is very nice but the monitor's strongest selling point is Mini Led tech. Mini Led is a next-gen tech currently found only in high-end TVs. With this technology, monitors can produce truer blacks sort of speak thanks to a greater number of dimming zones.
Odyssey Neo G9 is rated at 2000 nits in the brightness values and local dimming zones go to stunning 2048. It comes also with Quantum HDR that supports 10+, Freesync, and G-Sync capability. In connection, the department monitor comes with a single display 1.4 port and two HDMI 2.1 ports. It also includes a headphone jack along with two USB 3.0 ports.
Conclusion
While the resolution of the monitor is nothing impressive for the given price, its size and the rest of the tech specs surely are. Now I will not lie, the price is still a little too high but if you could afford it easily I think you should.
Hello and welcome to our software series review. Weel this time we could say this is more of a service review since the application we are going through today is online and you can use it freely without ever needing to install it.
When we choose software that we are going to review and recommend we really try to recommend something that is worth your time and money, Cartoonize fits in both categories in my opinion.
First of all basic plan of this graphic software is completely free and as mentioned it is working online, also as one more feature basic plan does not even require you to have an account of any kind, all you need to do is go to the website of the application and you can start using it right away. There is also paid plan for extra features if you need them billed monthly or annually.
Features
First things first, this is not Photoshop or GIMP and it does not aim nor want to be. This is something else, directed and pointed at the different types of users. This application is aimed at people that want to make some quick graphics and post them on social media and it does that very well. Even without knowledge to use graphic software this one is so well designed and straightforward that even a complete newcomer can do something right away.
So as the application that wants to be used by people that want to place some cool pictures or ads on their social media what it offers. For starters simplicity and ease of use, every option that you can use is on the left side of the screen nicely packed into the vertical toolbox. Inside the toolbox, you have access to various tools, effects, and filters that you can apply to your image.
Tools explained
Image manager
The first section on the tool panel is the image manager, here you can upload your images, delete them, search stock images, and so forth. nothing more to say about this one as it is only a basic file manager.
Edit
In this tool panel, there are a lot of basic settings for your image manipulations divided into 3 sections: Basics, Enhance, and Creative. In the basic section, you can crop, resize and rotate your image. Enhance panel will let you set exposure, color, vibrance, tint, and details (sharpen). Finally, the Creative part will let you remove the background with AI in a single click, replace colors in the image, and add a vignette and round image.
Effects
In the effects panel, you will be given 4 options to choose from Cartoonizer, Digital art, Sketcher, and painting. Each option once clicked will open another set of options tied to chosen preset where you will be able to choose a different style from chosen template. Once you click on the desired template it will be applied to your image and in the upright corner, you will have edit options to tweak it to your liking. You can play around as much as you want because only once you click on the apply button, the effect will be applied to your image.
Filters
Same as in the effects tool panel here you will also get a series of different filters that you can apply to your image. As in the previous tool once clicked on the chosen filter, you will be given options for its variations and details edits. How there is really plenty of filters options and combined with its own presets I will not focus on explaining what each one is doing since picture thumbnails are pretty accurate and just one look at them will explain to you everything you need to know.
Overlays
In the overlays panel, you can as the name says overlay different kinds of effects on your image. You can add snow, fog, sun flares rain, and many more. Presets work identically to previous effects and filters.
Masks
If you want to place your image in a certain shape or in-text this is the section for you. You will be presented with sections as custom text, shapes, brushes, floral, animals, and patterns. Each section will once again lead to plenty of variations on the chosen subject where you can pick one that you like the most and tweak its options.
Text
As the name suggests, this section is to add text to your picture or design. If you are making some cool ad for Facebook, Instagram, or other social media I believe that you will spend most of your time in this section adding text and tweaking it so it looks best. You have all the tools that you will need to make a catchy title or smaller block of text and you can add multiple texts to your picture tweaking their own visual appearance, the font used, color, and some effects like a drop shadow.
Draw
In the draw section, you will be able to freely draw whatever you like with your mouse or pen if you have one. you have basic options for a brush and eraser so you can erase stuff. Pretty basic tool but it gives a nice touch to underline something, circle it, etc.
Graphics
This panel will let you place various already made graphic assets into a picture. You have hearts, hats, glasses, etc. There really are tons of premade graphics along with thematic ones like new year, st. Patric day and more.
Frames
As the name suggests this section will place a frame of your choice around your picture. You can choose the style of frame, position, color, and many more. There are various styles and each style has its own options.
Conclusion
Cartoonize is a great online application that will let you quickly and easily do cool and nice image edits. As mentioned you can also add various effects, text, and graphics and use this app to make some quick and nice ads for social media. You have the option to publish to your social media right from the app in the save dialog but you can also of course download your image or design to your local computer.
Please note that for this review we used the pro, paid version so all of the features were unlocked. We wanted to give you a full overview of the full potential of the app. In my opinion, the small monthly fee that they charge is well worth it when you see all things that you can do with it.
Go to the cartoonize website and check it out, basic option is completely free and it does not even require making an account. Have fun, be creative and take care, I hope to see you again tomorrow.
Blizzard is one of the most beloved game company which brought some of the most and greatest titles in PC gaming. Blizzard has released its own launcher in which you can launch games, sadly sometimes launcher does not want to work and fails to connect.
If this happens to you be sure to:
Reset your network devices to make sure your router hasn't become flooded with data.
Power cycling your modem and router allows them to reset and re-establish a connection to your ISP. Follow these steps to completely power cycle the devices in your network connection:Note: If your modem has a battery backup, you will need to take the battery out or use the reset button on the modem.
Shut down all computers connected to the modem/router.
Power down and unplug the modem and the router if you're using one.
Allow to sit for 60 seconds unplugged.
Plug in and turn on the modem and router, and allow them to completely boot up until the front panel connection lights on the modem show a steady connection.
Start the computer and allow it to completely boot up.
If you're using a wireless connection, optimize your internet connection to rule out a connection issue.
If you're experiencing issues with your low-speed or wireless internet connection, follow the steps below to troubleshoot the problem.
Try plugging your computer directly into your modem.
Shut down other programs that access the internet, such as other games or download programs.
Satellite, mobile phone, and WiMax internet connections are not stable connections and may cause further connection issues when playing Blizzard games. If possible, consider switching to a more stable connection.
Update your drivers and operating system to resolve any compatibility issues.
Out-of-date drivers and operating systems can cause a variety of issues and are one of the first things to check when a game is having problems. The instructions below will help you check and update your drivers.
Even new computers can have out-of-date drivers and operating systems because updates are released routinely.
Some games and programs might run fine on a system with old drivers, but outdated drivers can still create technical issues with specific games or programs.
Check our supported video cards articles to make sure your hardware is compatible:
Refer to the steps below to update drivers and software for your operating system.
Release and renew your IP and flush your DNS to resolve any network conflicts.
While on the desktop, press Windows Key and type CMD.
Right-click Command Prompt and select Run as administrator.
Type ipconfig /release in the command prompt.
Wait a few seconds for a reply that the IP address has been released.
Type ipconfig /renew in the command prompt.
Wait a few seconds for a reply that the IP address has been re-established.
Type ipconfig /flushdns in the command prompt.
Close the command prompt and attempt to make a connection.
Close all other applications to resolve software conflicts and free up resources.
Before trying the steps below, close unnecessary programs and restart your computer.
Identify Problematic Startup Items
Press Ctrl+Shift+Esc to open the Task Manager.
Click More Details.
Select the Startup tab.
Right-click on each item and select Disable.
Restart the computer.
If this resolves the issue, enable the startup application one at a time to determine which one is causing the problem. You will need to restart between each application you enable.
Note: To re-enable startup applications, follow steps 1-4 and select Enable.
Delete the Battle.net Tools folder to automatically rebuild outdated or corrupt files.
Close Blizzard processes.
Press Ctrl + Shift + Esc to bring up the Task Manager.
Click the Processes tab.
Select all Agent, Blizzard Battle.net desktop app, and game processes, and click End Process.
Navigate to the folder containing the Battle.net directory:
Press Windows Key + R to open the Run dialogue.
Type C:\ProgramData\ into the Open field and press Enter.
Delete the Battle.net folder.
Run Battle.net and update the game to see if the issue persists.
If the error persists after you try these steps, another program may be causing the problem. Restart your computer and delete the Battle.net folder one more time.
Note: The above steps may cause the Blizzard Battle.net desktop app to forget game install locations. If your games can’t be found, you will see Install on the Blizzard Battle.net desktop app game tab instead of Play. To find your installation, click Locate this game or run the game launcher.
800b0100 is a typical Windows Update error. This error message occurs when you try to install the latest updates from Microsoft Updates and Windows Updates. The error message is displayed in the following format:
“Code 800B0100 Windows Update encountered an unknown error.”
Solution
Error Causes
Error code 800b0100 may pop up on your computer screen due to different reasons. However, some of the common causes include:
The file needed by Windows Update is corrupt or missing
Security software conflict such as Firewall
Incorrect Registry keys
Windows security .dll files are registered incorrectly
Further Information and Manual Repair
To resolve error code 800b0100 on your system, you don’t have to hire a professional. This error is quite easy to repair and requires no technical expertise. In other words, you don’t need to be a computer programmer or technically sound to repair this issue.
Here are some of the easy and effective DIY methods that you can try to resolve error code 800b0100 on your system:
Method 1
Download System Update Readiness Tool from Microsoft’s website on your PC. This tool can help you fix this problem that might prevent Windows Updates from installing.
Typically it will take 15 minutes or less to scan your entire PC. The System Update Readiness Tool will scan your computer for inconsistencies that may cause errors to occur.
Method 2
Disable Security Software on your PC for example if you use Windows Vista then you will have Firewall already built in.
Disable it to resolve error 800b0100. To do this, simply go to the start menu and open the control panel and then select security. Now locate the option Windows Firewall and upon finding, simply choose the option Turn Windows Firewall on or off. Select off (not recommended) option, then click Apply and OK to reset and confirm changes.
After that, go back to the Windows Update screen and then click the try again button. The download and installation would start.
After the installation is complete, restart your PC to activate changes. Once the updates are successfully installed, not re-enable the Firewall, to ensure your PC is not exposed to potential security threats or viruses.
Method 3
Remove Invalid Keys from the Registry by downloading Restoro.
This is a PC Fixer deployed with a registry cleaner. It scans your entire PC and removes all the obsolete and unnecessary files like cookies, bad and invalid registry keys. It cleans and repairs the registry in a few clicks.
Click here to download Restoro.
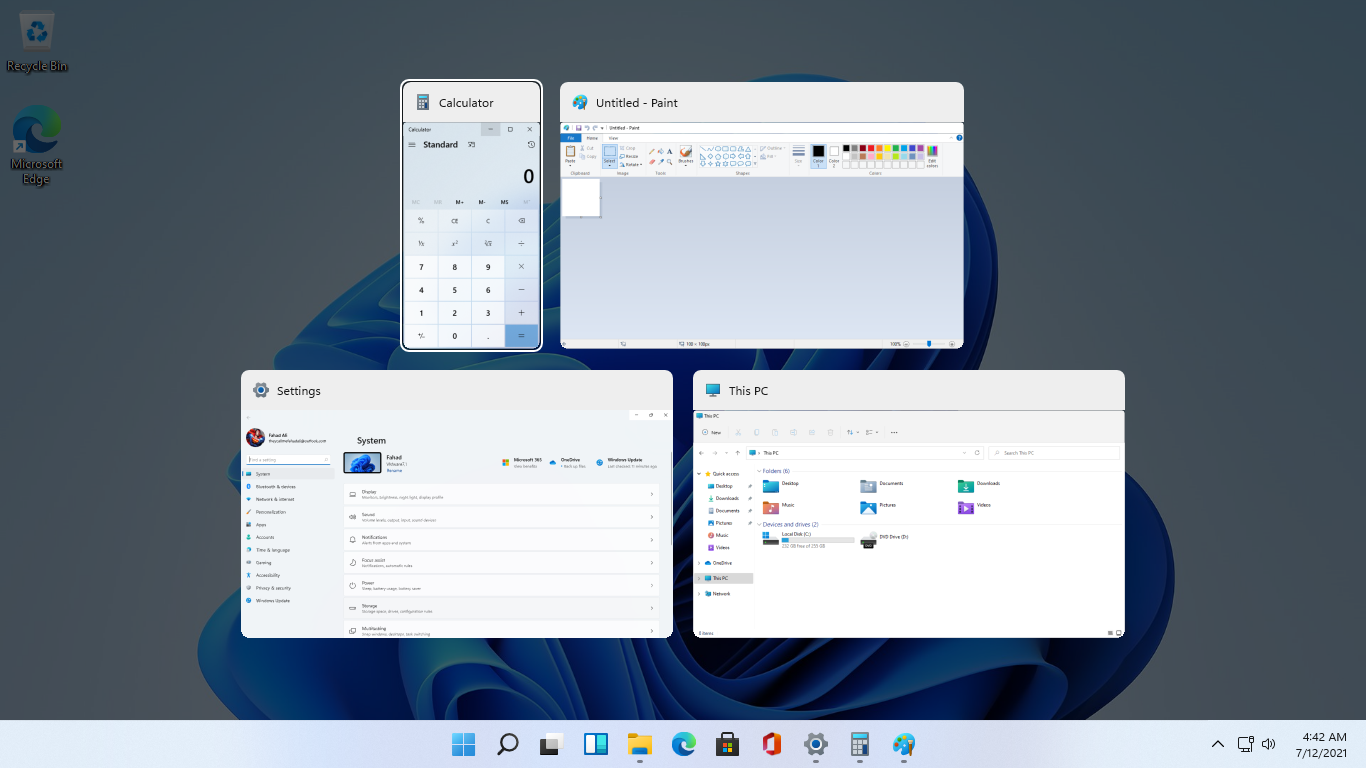
As in previous Windows 10, inside Windows 11 also when you press the ALT + TAB key combination you will get a preview of all running applications along with all Browser tabs so you can go through them and pick the one you want to switch to.
Alto, I personally am a big fan of alt-tabbing, I must admit that I am not a big fan of having multiple browsers tabs on screen when I do press key combo. Luckily there is a very easy way to turn this feature off.
Turning browsers tabs thumbnails off
Press ⊞ WINDOWS + I to open settings
Click on System in the sidebar
Scroll down and select Multitasking
Find Alt + Tab section and click on the drop-down menu
Pick Open Windows Only
Close settings
Now when you press the ALT + TAB key combination you will still see your browser but only an active tab in it instead of all tabs as different preview thumbnails.
0x8007005 is a Windows Error Code. You may come across this error if you don’t have the appropriate permission to install a particular Windows update. It is prompted as ‘Access Denied’ error message.
Solution
Error Causes
The error code 0x80070005 usually triggered because of 2 reasons:
Some updates require administrative permissions to be installed
Due to malware and viruses
Further Information and Manual Repair
If you face this error while installing Windows updates on your PC, it is advisable to fix it immediately.
By taking timely actions, you can update your PC easily and in case if the cause of the error code 0x80070005 is malware or some virus, you can stop it from causing more and serious damage to your system. Sometimes malware and viruses can lead to data loss.
To avoid such damages here’s what you need to do:
Cause: Updates require administrative permission
Quick Fix: If the 0x8007005 error occurs on your system due to administrative permission issues, then the best way to fix this error right away is to log on as an administrator.
If there are many user accounts on your PC, then to resolve this error, make sure you log on using the user account that has administrator permissions on the computer.
Once you log on as an administrator, now try to install the updates again.
Cause: Malware and Viruses
Quick Fix: If the error 0x80070005 occurs because of malware infection, the best way to resolve this error would then be to open your antivirus software and run a scan to detect the malware.
However, if you don’t have antivirus software installed on your system, then it is advisable to download the software immediately.
Download antivirus software. To be on the safe side download Microsoft Safety Scanner.
Click on the run when prompted. Once the scanner is installed on your PC create a shortcut to Safety Scanner on your computer desktop so that it is easily accessible.
Now double click on the icon and click on the full scan tab to start scanning for malware and viruses on your system. After the scan is complete, you will see a list of viruses on your PC.
Now remove them all by hitting the delete tab and then repair. Now try installing the updates again.
By following these quick-fix techniques, you can easily resolve the error 0x80070005 on your system by yourself, without calling an IT professional.
If you have a USB that has stopped working and does not show any signs of life do not throw it away just jet.
Hello and welcome to another great tutorial on errortools.com, today we will explore how to bring back to life dead USB memories.
Detect a Corrupted Drive:
If your computer is still able to detect your USB drive, you might want to know if it’s been corrupted. Select the Properties of the drive folder and check the device status. If it says This device is working properly this USB drive is worth saving. There’s no need to worry if you can’t see the USB drive folder.
Erase the USB Drive with Diskpart Tool
Press ⊞ WINDOWS + X top open start menu and choose Command prompt (admin)
Type diskpart and press ENTER
Type in list disk and press ENTER
Locate your USB drive by size and type in select disk#, where # is the number of removable disks.
Reallocate the USB Drive Volume
Press ⊞ WINDOWS + R to open the run dialog and type in diskmgmt.msc
Select the USB drive and Right-click on it and select create simple volume. It will lead to a new simple volume wizard window.
Once you click next, you can specify the volume size for the pen drive. Select the maximum volume, which is shown as a default unit in MB.
As soon as you see the next step, select assign drive letter which will help you view your pen drive once again.
Format the partition in the next step. This may be just an extra step because you have already wiped the data clean. But it is always better to be sure.
Click Finish to complete the new simple volume wizard which will now be allocated to the USB drive.
After you reallocate the unallocated USB drive space, you will be able to view the USB drive storage once again.
If a program tried and failed to use the Graphics rendering capabilities of a computer, Windows 10 will most likely throw a Blue Screen error that says, “ THREAD_STUCK_IN_DEVICE_DRIVER ”. 0x000000EA is the Stop code for this particular Blue Screen error and could be caused by a bad display driver or bad video card. Whatever the cause is, here are some suggestions you need to check out to resolve this Blue Screen error.
Option 1 – Try to rollback, update, or disable the Graphics card drivers
Since the THREAD_STUCK_IN_DEVICE_DRIVER Blue Screen error has something to do with Graphics card drivers, you can either roll back, update or disable them depending on your preference in order to resolve the error.
First, boot your computer into Safe Mode.
After that, tap the Win + R keys to launch Run.
Type in devmgmt.msc into the box and tap Enter or click OK to open the Device Manager.
After that, a list of device drivers will be displayed. From there, look for the Display Adapters and click on them.
After that, right-click on each entry under the Display Adapters and select the “Uninstall Device” option from the menu.
Now restart your computer.
After restarting your computer, go to the Settings app and Check for Updates in the Windows Update section.
Note: You also have the option to go directly to the website of your graphics card manufacturers like NVIDIA, Intel, or AMD and go to the section called Drivers then check if there’s a new available update – if there is, download and install it.
Option 2 – Try removing hardware or drivers that you’ve installed recently
If you have recently installed some hardware or drivers, you might want to disable or remove them since external devices are proven to be one of the factors that trigger Blue Screen errors like THREAD_STUCK_IN_DEVICE_DRIVER. All you have to do is physically disconnect any external devices that are connected to your computer and then check if it fixes the BSOD error or not.
Option 3 – Run System File Checker at boot time
Once you get to the Welcome Screen part, click on Next.
Afterward, click on the Repair your computer option located on the bottom-left part of the window.
Then click on Troubleshoot.
Next, select the Advanced Options and then Command Prompt.
After opening Command Prompt, type the “sfc /scannow” command and hit Enter to run the System File Checker scan.
Wait until the process is completed and type “exit” to close Command Prompt and then restart your computer to successfully apply the changes made.
Option 4 – Try to run the Blue Screen Troubleshooter
As you know, the Blue Screen troubleshooter is a built-in tool in Windows 10 that helps users in fixing BSOD errors like the THREAD_STUCK_IN_DEVICE_DRIVER error. It can be found in the Settings Troubleshooters page. To use it, refer to these steps:
Tap the Win + I keys to open the Settings panel.
Then go to Update & Security > Troubleshoot.
After that, look for the option called “Blue Screen” on your right-hand side and then click the “Run the troubleshooter” button to run the Blue Screen Troubleshooter and then follow the next on-screen options. Note that you might have to boot your PC into Safe Mode.
Option 5 – Try to manually check the Graphics Card hardware
You might also want to check the physical status of your Graphics card and you can do this by disconnecting the Graphics card or any other external device connected to your computer. Once you’ve removed the external device, check it for any damages. If there’s none, connect it back to your computer and check if the THREAD_STUCK_IN_DEVICE_DRIVER Blue Screen error is fixed or not.
Option 6 – Uninstall any faulty drivers
You can also uninstall any faulty drivers via Device Manager. How? Refer to these steps:
Tap the Win + R keys to launch the Run dialog box.
Then type “devmgmt.msc” in the field and tap Enter to open the Device Manager.
From there, look for any faulty drivers. You can identify them easily as they will be marked with a yellow exclamation point. And then check which entries would not affect the normal functioning of your PC.
Now click on the entries of every faulty driver and click on the Uninstall option.
Once you’ve uninstalled them, restart your computer to allow your computer to reinstall the faulty drivers you’ve just removed.


 Odyssey Neo G9 is a successor to Odyssey G9 curved gaming monitor and it is aimed again at the gaming community with its specifications but of course, it can be used for work as well.
Gapping at a stunning $2500 USD price it is not really a cheap piece of hardware so it is normal to see what do you get for this kind of price and do features justify it, so let’s dive in.
Odyssey Neo G9 is a successor to Odyssey G9 curved gaming monitor and it is aimed again at the gaming community with its specifications but of course, it can be used for work as well.
Gapping at a stunning $2500 USD price it is not really a cheap piece of hardware so it is normal to see what do you get for this kind of price and do features justify it, so let’s dive in.

 As in previous Windows 10, inside Windows 11 also when you press the ALT + TAB key combination you will get a preview of all running applications along with all Browser tabs so you can go through them and pick the one you want to switch to.
Alto, I personally am a big fan of alt-tabbing, I must admit that I am not a big fan of having multiple browsers tabs on screen when I do press key combo. Luckily there is a very easy way to turn this feature off.
Turning browsers tabs thumbnails off
As in previous Windows 10, inside Windows 11 also when you press the ALT + TAB key combination you will get a preview of all running applications along with all Browser tabs so you can go through them and pick the one you want to switch to.
Alto, I personally am a big fan of alt-tabbing, I must admit that I am not a big fan of having multiple browsers tabs on screen when I do press key combo. Luckily there is a very easy way to turn this feature off.
Turning browsers tabs thumbnails off