Logo

Error 0x00000024 – A Quick Fix

What is Error 0x00000024?

Error 0x00000024 can be seen when you start up and a screen comes up asking which mode you would startup in.

Regardless of the mode you select, it leads up to the Windows screen with the loading bar and your computer crashes from there onwards. When you press F8 in order to select the “Disable Automatic Restart On System Failure” option, that is when this error shows up:

ST0P 0X00000024 (x00190203, 0x82700550, 0xc000012, 0x00000000)

Due to this error, both Safe and Normal modes become inaccessible.

Solution

Restoro box imageError Causes

If you’re having this error then it is the indication of an issue with the file NTFS.sys. Further, there might also be problems with the IRP (Interrupt Request Packet) or the disk may have been corrupted.

There are multiple other causes of this error, including heavy fragmentation of your hard drive or problems caused by your antivirus software.

Further Information and Manual Repair

First and foremost, you are suggested to run Chkdsk. In order to do this, you have to enter your BIOS and select CDROM as your primary booting device. Now follow the below-mentioned steps:

  1. Insert your Windows XP installation CD into the CDROM and reboot your PC.
  2. Press any key to proceed with the boot from CD when you are prompted to do so.
  3. When the Windows XP setup menu shows up, hit the “R” key to proceed with repairing Windows.
  4. If there is only one Windows installed on your computer then hit the “1” key and proceed by pressing enter. If there are more than two Windows then hit the number which is associated (according to the screen you are viewing) to the Windows you want to repair. Usually, this is C:/Windows and associated with “1” but if that is not the case then you should simply press the number that corresponds with the windows you want to repair and proceed.
  5. Now, you will see a screen that prompts you to enter your administrator password. Most people don’t have an admin password and in that case, you should simply hit enter and you’d be good to go. If you do have an administrator password, however, then you should type it in, hit enter, and proceed.
  6. When the DOS prompt shows up, type in chkdsk/f and hit return.

If you see no improvement in solving Error 0x00000024, and the problem keeps persisting, then you should start over. But this time you should type sfc/scannow instead of chkdsk/f and hit return.

There are a few other complex methods that you can try as well but this is the most recommended procedure as it is easier, quicker, and most likely to fix the error.

Do You Need Help with Your Device?

Our Team of Experts May Help
Troubleshoot.Tech Experts are There for You!
Replace damaged files
Restore performance
Free disk space
Remove Malware
Protects WEB browser
Remove Viruses
Stop PC freezing
GET HELP
Troubleshoot.Tech experts work with all versions of Microsoft Windows including Windows 11, with Android, Mac, and more.

Share this article:

You might also like

Fix One Drive Error: This is not a valid file name
As you know, Microsoft’s consumer cloud storage platform is none other than OneDrive. It is where users can save any of their files albeit it’s mostly used to store common files like documents and photos. However, there are times when you might encounter some problems when saving these files. Recently, some users reported that they had problems saving Word documents to OneDrive and if you experience the same issue, then you’ve come to the right place as this post will guide you on how to resolve it. According to users who encountered the problem, when they try to save Word documents on OneDrive, an error message appears instead stating, “This is not a valid file name”. This kind of error only occurs when the file is opened from within OneDrive for saving in a different folder. In other words, if the file is saved in the same folder, the error won’t pop up but if it is saved in a separate folder, that’s when the error appears. Worry not though for fixing this error is not complicated and won’t take too long. It seems that this error is due to the 259-character limitation when creating and saving files as far as the Office products are concerned. To resolve it, there are several workarounds you can check out. Before you proceed with these workarounds, make sure that you have a stable internet connection.

Option 1 – Try renaming the file with a shorter name

The first thing you can do to fix the problem is to rename the file with a shorter name. Just right-click on the file and select the Rename option from the menu and then type in the new name and click OK or tap Enter to rename the file.

Option 2 – Try renaming the folders where the file is located

Like what you did in the first given option, all it takes is a right-click but this time on a folder. Rename the folder with a different name and save the changes made and then check if you can now save the Word document on OneDrive.

Option 3 – Try moving the file to a folder with a shorter path

If the first two options didn’t work, you can try moving the file to a folder with a shorter path. Note that it is not the same as doing it locally on a Windows 10 computer so you have to right-click on the file and select the “Move to” option. After that, locate the folder where you want to move the file and select it and then click on the Move button to complete the task.

Option 4 – Try making some changes in the document

You could also try to make some modifications to the document. Once you’ve done that, click the File tab and select the Save As option and then go to the folder where you want to save the file and tap enter.
Read More
Enable Windows Sandbox on Windows
One of the most common ways cybercriminals use to inject suspicious code into devices is by tricking users into installing a malicious program on a targeted device. Oblivious users are vulnerable to such tricks, which is why Microsoft has been working hard in the background to address this issue. Recently, Microsoft announced the availability of a sandboxed version of Windows 10 that runs inside Windows 10 in order to isolate suspected software to run inside it and protect the system from potential threats. This Windows Sandbox feature is a new feature that keeps your computer secure. It is a virtual disposable environment that you can enable. So if suspect any software of being malicious, you can run this software in an environment and ensure that it won’t interfere with any normal processes and would not jeopardize files on your computer. To simply put it, “Windows Sandbox is a new lightweight desktop environment tailored for safely running applications in isolation”. So if the Sandbox is closed, all the residual files, software, and other data are deleted permanently. To enable Windows Sandbox, refer to the instructions provided below. Step 1: You have to make sure that you are running either Windows 10 Enterprise Editions or Windows 10 Pro and that your computer is running build 18305 or newer. Step 2: After that, you have to enable Virtualization to let another instance of Windows 10 running in Sandbox mode. Step 3: Next, search for Windows Features on and off in the search box and then select the appropriate entry. Step 4: From the list, go to the mini window and check the Windows Sandbox and then click on OK. Step 5: Afterwards, in the Cortana Search box, search for “Windows Sandbox” and select the related entry to run it in an elevated window. Step 6: Then from your main computer (host), copy the executable file and paste it inside the Windows Sandbox environment. Step 7: Now run the executable file in the Sandbox environment and use it as you normally do. Step 8: Once you’re done, close the Windows Sandbox application and as mentioned, every data regarding the executable file and the temporary environment will be deleted. Step 9: And for the sake of safety, ensure that there are no modifications made to the host because of the executions in the Sandbox environment. You have the option to contact Microsoft for feedback related to Windows Sandbox. You can use the traditional Feedback Hub if you have any suggestions or any issues. Just fill in the appropriate details and select Windows Sandbox for the feature category under the Security and Privacy section. And if you have any issues related to the execution of and within Windows Sandbox, simply choose “Recreate my problem” then select Start capture to reproduce the issue, and once you’re done, select Stop capture.
Read More
An Easy Guide to Fixing Mingwm10.dll Error Code

Mingwm10.dll Error Code - What is it?

Mingwm10.dll is a dynamic link library file. This file is associated with the gaming program called the Adventures of Tintin developed for Windows OS by Ubisoft. Like all other DLL files, Mingwm10.dll file also contains small programs that are used to load and run this gaming program on your PC and several other programs developed by Ubisoft. Mingwm10.dll error code may occur when this file fails to run and load the Adventures of Tintin, the game on your PC. This error may appear on your PC in different formats such as:
  • "Mingwm10.dll not found."
  • "The file mingwm10.dll is missing."
  • "Cannot register mingwm10.dll."
  • "Cannot find C:\Windows\System32\mingwm10.dll."
  • "Mingwm10.dll Access Violation."
  • "Cannot start The Adventures of Tintin The Game. A required component is missing: mingwm10.dll.Please install The Adventures of Tintin The Game again."
  • "This application failed to start because mingwm10.dll was not found. Re-installing the application may fix this problem."

Solution

Restoro box imageError Causes

Mingwm10.dll error code is triggered due to a plethora of reasons. These include causes like:
  • Registry damage or corruption
  • Viral infection
  • Hardware failure
  • Corrupt or missing Mingwm10.dll file
Though this error is not fatal nonetheless it is advisable to fix it promptly to ensure you are able to access your desired program successfully without any restriction. Please note, this error can become a major PC threat as the underlying causes are registry corruption or viral infection.

Further Information and Manual Repair

Listed below are some of the best, proven, and easy DIY methods to help you resolve the Mingwm10.dll error code on your system. These are simple methods and require no technical expertise or know-how.

Method 1 - Restore the Missing File

As mentioned above DLL are shared files, there is a possibility that you accidentally deleted the Mingwm10.dll file on your system while uninstalling a program developed by Ubisoft. In such an event, the best and the easiest way to fix the error is to check your recycle bin and restore the deleted Mingwm10.dll file on your system.

Method 2 - Download Mingwm10.dll File from a Reliable Website

If you are unable to locate the missing Mingwm10.dll file in the recycle bin, then another method to fix the issue can be to download the Mingwm10.dll file from a trusted website. The reason why we say trusted is that viruses often enter computer systems when users download files from unreliable websites. So, to avoid bigger problems first make sure the site you select to download the Mingwm10.dll file is authorized and trusted.

Method 3 - Update Outdated Drivers

Hardware failure is related to outdated drivers. If the cause of the Mingwm10.dll error code is hardware failure, simply update the outdated drivers to resolve. Since the Mingwm10.dll file is used to run and load Adventures of Tintin, a gaming software program, then most probably the error is caused because of the outdated video card driver. Therefore update it to fix the issue. For this, go to the start menu, type Device Manager in the search bar. Once it opens use the driver update wizard to make updates. The wizard will walk you through the entire process, making the driver update task easy.

Method 4 - Repair the Corrupt Registry

The registry is the part that stores all the information and activities performed on your system. From important files to obsolete files it saves everything. If the obsolete files like the junk files, bad entries, invalid registry keys, and cookies are not removed from the registry frequently, these files accumulate in the registry and corrupt important system files like DLL files, popping error codes like Mingwm10.dll error. To resolve, download Restoro. It is a PC Fixer embedded with a  registry cleaner. The registry cleaner scans and removes all the obsolete files. It cleans the registry and the corrupted system files in just a few clicks, thereby fixing the problem. Click here to download Restoro to resolve the Mingwm10.dll error code on your PC
Read More
How to Fix Windows 10 Error Code 0xc0000142

Error Code 0xc0000142, What is it?

Error code 0xc0000142 is an error code that affects Windows 10 users. It often occurs when users attempt to run Windows applications. The message in the application error box allows users to recognize the error as it states that “the application was unable to start correctly (0xc0000142).” Common symptoms of this error code include the following:

  • Inability to start applications
  • Inability to completely run Windows applications
  • The appearance of error code 0xc0000142 message box

Error Causes

Error code 0xc0000142 in Windows 10 is often caused by issues related to startup programs, corrupted files or other applications. To address this issue, the source of the issue needs to be located. But how will users be able to do this while the error code is present?

Further Information and Manual Repair

To fix error code 0xc0000142 users will need to employ at least one manual repair procedure. This may include checking your system for corrupt files through tools like Microsoft’s System File Checker (SFC). If you are uncertain of your skills or prefer to get professional support, contact a Windows repair technician to assist you.

The top three methods to resolve error code 0xc0000142 include the following:

Method One: Perform a Clean Boot

A clean boot is one of the most basic procedures you can run to solve a Windows-based error code of this nature. It works by identifying whether or not conflict among startup programs is preventing Windows applications from running properly. This occurs through a clean boot process involving Windows using a minimal set of drivers and startup programs when you reboot.

Here is what you’ll need to do:

  • Step one: Go to Start and type msconfig
  • Step two: Right-click and select System Configuration
  • Step three: Select Service tab and click Hide all Microsoft Services then click Disable all.
  • Step four: Click Startup tab within the System Configuration dialog box.
  • Step five: Select Open Task Manager
  • Step six: Within the Startup tab of Task Manager, select Disable for each Startup item, then close Task Manager.
  • Step seven: Click OK on the Startup tab of System Configuration.
  • Step eight: Restart your computer.

This method resolves software conflict arising when you attempt to update, run a program or simply use your operating system. However, if error code 0xc0000142 remains unresolved after you restart your machine, follow the next step below.

Method Two: Run a System File Checker Scan

System File Checker (SFC) is a utility tool built into the Windows 10 operating system, as well as other versions of Windows, to detect and repair corrupted system files. Since corrupted system files can result in error code 0xc0000142, run this tool by following the steps below:

  • Step one: Go to Start and type Command Prompt or CMD.
  • Step two: Right-click and select Administrator
  • Step three: Check for and repair corrupted system files. Simply type sfc /scannow. (Be sure to place a space between “sfc” and “/scannow”).

Once these procedures are followed, the System File Checker tool will automatically scan your machine, and find and repair corrupted files. If this is the source or underlying cause of error code 0xc0000142 on your system, the error code will be resolved. However, if the source of the issue is not due to corruption in our system or is simply a more complicated issue try the next method highlighted below.

Read More
Fix Steam stuck on Allocating disk space
If you have been stuck on allocating disk space on steam you know how annoying this error could be. Here you are, with your new game eager to play it and relax a little and all of the sudden steam gets stuck on allocating disc space. Luckily this error is fixable, follow provided guide to fix the error and continue with installing the game.
  1. Restart computer

    An old age solution of turning it off and turning it back on but in this case, it works 90% of the time.
  2. Run Steam as administrator

    Allocating disk space when done by a third-party application can be a task that requires privileges higher than the normal user. Find the steam executable file in the installation folder, right-click on it and run it as an administrator
  3. Clear Steam cache

    Launch Steam in admin mode. Once in the client, click on Steam at the top left corner of the screen. From the drop-down box, click on Settings. Once in the Settings, navigate to the Downloads tab. Click the Clear Download Cache option. Click OK on the prompt to confirm your action. Wait for the process to complete. When done, save changes and exit the client.
  4. Change download server

    Launch Steam client in admin mode. Once in the client, click on Steam at the top left corner of the screen. From the drop-down box, click on Settings. Once in the Settings, navigate to the Downloads tab. Click the drop-down menu under the Download Region. Choose a different server to download from. Exit the Steam client.
  5. Refresh installation files

    • Kill a Steam process in Task Manager.
    • Navigate to your Steam folder
    • Inside the Steam folder, select everything except the steamapps folder and the Steam.exe executable file.
    • Tap the Delete key on your keyboard.
  6. Turn off firewall

    Firewall can prevent steam and cut access to system operations, disable firewall to fix this issue.
  7. Stop overclocking

    If you have overclocked your PC, you can simply reverse the change. The steps you will need to take depends on the overclocking software. Launch the software and look for the option to stop the overclocking. Once done, restart your computer, rerun the game installation.
Read More
What is HEIF file format and how to use it?
High Efficiency Image File Format (HEIF) is a container format for individual images and image sequences. The standard covers multimedia files that can also include other media streams, such as timed text, audio, and video. A HEIF image using High-Efficiency Video Coding, HEVC, requires only about half the storage space as the equivalent quality JPEG. HEIF also supports animation and is capable of storing more information than an animated GIF or APNG at a small fraction of the size. HEIF files are a special case of the ISO Base Media File Format (ISOBMFF, ISO/IEC 14496-12), first defined in 2001 as a shared part of MP4 and JPEG 2000. Introduced in 2015, it was developed by the Moving Picture Experts Group (MPEG) and is defined as Part 12 within the MPEG-H media suite (ISO/IEC 23008-12). HEIF was adopted by Apple in 2017 with the introduction of iOS 11, and support on other platforms is growing.

HEIF files can store the following types of data:

Image items
Storage of individual images, image properties, and thumbnails.
Image derivations
Derived images enable non-destructive image editing and are created on the fly by the rendering software using editing instructions stored separately in the HEIF file. These instructions (rectangular cropping, rotation by one, two or three quarter-turns, timed graphic overlays, etc.) and images are stored separately in the HEIF file, and describe specific transformations to be applied to the input images. The storage overhead of derived images is small.
Image sequences
Storage of multiple time-related and/or temporally predicted images (like a burst-photo shot or cinemagraph animation), their properties, and thumbnails. Different prediction options can be used in order to exploit the temporal and spatial similarities between the images. Hence, file sizes can be drastically reduced when many images are stored in the same HEIF file.
Auxiliary image items
Storage of image data, such as an alpha plane or a depth map, which complements another image item. These data are not displayed as such but used in various forms to complement another image item.
Image metadata
Storage of EXIF, XMP and similar metadata which accompany the images stored in the HEIF file.
Read More
Different types of computer viruses
Computer viruses are malicious applications that have the ability to self replicate and spread over the system and various devices, just like viruses in organisms. We all know that computer viruses are bad and that you should avoid them however you can. So in this spirit, we are taking a deeper dive into what kind of viruses exist and how they function.

viruses types1. File-infecting Virus

A virus that attached itself to an executable program. It is also called a parasitic virus which typically infects files with .exe or .com extensions. Some file infectors can overwrite host files and others can damage your hard drive’s formatting.

2. Macro Virus

This type of virus is commonly found in programs such as Microsoft Word or Excel. These viruses are usually stored as part of a document and can spread when the files are transmitted to other computers, often through email attachments.

3. Browser Hijacker

This virus targets and alters your browser setting. It is often called a browser redirect virus because it redirects your browser to other malicious websites that you don’t have any intention of visiting. This virus can pose other threats such as changing the default home page of your browser.

4. Web Scripting Virus

A very sneaky virus that targets popular websites. What this virus does is overwrite code on a website and insert links that can install malicious software on your device. Web scripting viruses can steal your cookies and use the information to post on your behalf on the infected website.

5. Boot Sector Virus

These viruses are once common back when computers are booted from floppy disks. Today, these viruses are found distributed in forms of physical media such as external hard drives or USB. If the computer is infected with a boot sector virus, it automatically loads into the memory enabling control of your computer.

6. Polymorphic Virus

This virus has the capability to evade anti-virus programs since it can change codes every time an infected file is performed.

7. Resident Virus

A resident virus stores itself on your computer’s memory which allows it to infect files on your computer. This virus can interfere with your operating system leading to file and program corruption.

8. Multipartite Virus

A type of virus that is very infectious and can easily spread on your computer system. It can infect multiple parts of a system including memory, files, and boot sector which makes it difficult to contain.
Read More
Android apps inside Windows 11
Android apps inside Windows 11
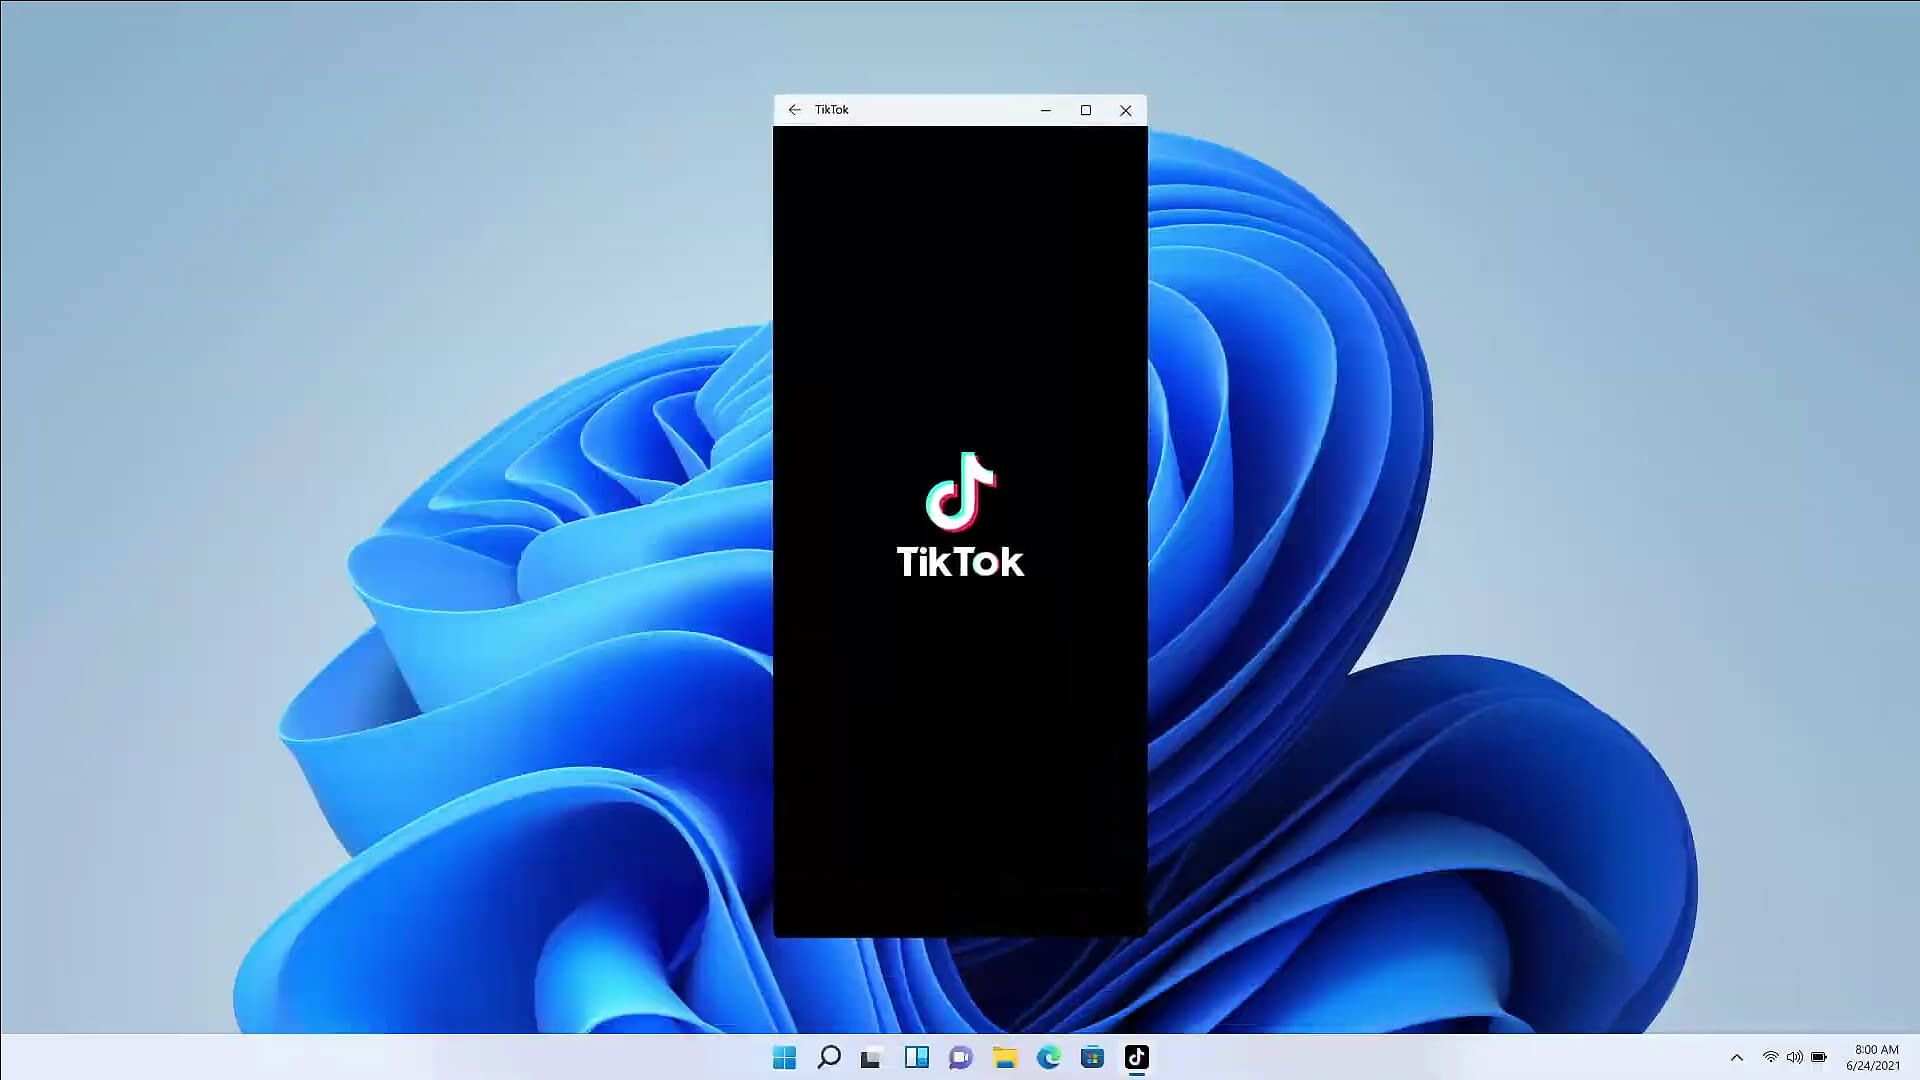
The euphoria around Windows 11 is not dying and reveal that Android apps will work natively inside Windows 11 has raised many emotions and questions. So, Microsoft has announced that Android apps will run natively inside Windows 11 OS and that they will reside alongside your other installed ones as icons, etc. It is no secret that many users have been using emulation software to run Android apps inside Windows so far, so what is the difference?

It is still emulation

Whatever you would like to believe it is still emulation and Android apps are at the end of the day still Android apps running inside emulated environment. This time we will not need third-party emulation software running inside Windows, we will have third-party emulation services running inside Windows. Intel has teamed up with Microsoft in order to integrate Intel bridge algorithms in order to run Android apps, meaning that yea, pretty much we have emulation services running in order to run the application. The problem with this kind of approach is that well emulation software is running and consuming system resources only when we start it, this kind of service is always running and always consuming resources and for someone who really does not care about Android apps at all, this is just a waste of resources.

Android store

The store is another issue here, instead of the Google play store we will have the Amazon app store integrated inside the new Microsoft store. This means that any kind of for example game progress or login information from Google store cannot be transferred into Windows 11, add to that information that in the Amazon app store there are tons of missing applications like SLACK, TRELLO, BitWarden, etc and we might have a serious question here about the use of this feature.

Android apps that do not use Android services

If you even look past that it is still emulation and that it is available on the Amazon app store there is still concern about applications not using Google services for their running. Many Android apps are relying on Google services like location or optimize their use of on-device resources, handle in-app purchases, etc. that cannot be found on this system. Uber is a prime example that uses Google location service to determine your location and for its mapping data, with that application, is useless. Other like Guardian will even pop up message that says Google play service is required in order to even work.

Android apps without Eero system

Amazon Eero system for enhanced internet access is not even yet available in its own app store which brings us to missing some key players like Bank of America, Chase mobile, Bueller, etc. And across the board, the apps that are present in the Amazon Appstore are often as good as abandoned. Lots of titles are numerous versions behind their up-to-date Play Store counterparts, and plenty of programs you encounter in the Amazon environment clearly haven't been touched in years.

Conclusion

Many new Windows 11 features are quality features that I personally consider good but although this one seems innovative and good I simply cannot stand back it up. Android apps were already inside Windows with emulation software which used google services and was working just fine, this was not needed in my opinion.
Read More
Fix boot into the next phase of installation
There are various complex tasks that take place under the hood while you upgrade or clean install the Windows operating system on a computer. Because of its complexity, there are times when you might encounter some errors when you upgrade or clean install Windows 10. One of the errors you could encounter is the error that states, “Windows could not prepare the computer to boot into the next phase of installation. To install Windows, restart the installation”. This error does not only occur in Windows 10 as it could also occur on the other versions of Windows. There are a lot of possible causes for this error. It could be due to incompatible BIOS, corrupted system files, improper installation media or it could also be due to excessive hardware plugged into your computer and so on. Whatever the cause is, here are some potential fixes you need to check out to fix the problem.

Option 1 – Try to disconnect or disable newly installed hardware

In this option, you will have to disable or remove the hardware you’ve just installed recently since external devices could be the one that’s causing the Blue Screen of Death error to appear. To do that, just disconnect any external device that’s connected to your computer physically and then check if it fixes the error.

Option 2 – Try to update the BIOS

As you know, the BIOS is a sensitive part of a computer. Even though it is a software component, the functioning of the hardware depends on it largely. Thus, you must be careful when modifying something in the BIOS. So if you don’t know much about it, it’s best if you skip on this option and try the other ones instead. However, if you are well-versed in navigating the BIOS, then follow the steps below.
  • Tap the Win + R keys to open the Run dialog box.
  • Next, type “msinfo32” in the field and press Enter to open System Information.
  • From there, you should find a search field on the bottom where you have to search for the BIOS version and then press Enter.
  • After that, you should see the developer and version of the BIOS installed on your PC.
  • Go to your manufacturer’s website and then download the latest version of BIOS on your computer.
  • If you are using a laptop, make sure that you keep it plugged in until you have updated the BIOS.
  • Now double click on the downloaded file and install the new BIOS version in your computer.
  • Now restart your computer to apply the changes made.

Option 3 – Try to reconfigure all the created partitions

You could also try to reconfigure the partitions by deleting and recreating all the available partitions on your computer and then see if it fixes the problem.

Option 4 – Make a proper bootable USB Drive/Stick

To make a proper bootable USB drive, you need to use the Windows Media Creation tool. The Media Creation tool in Windows allows you to use the ISO installation file to make a bootable device that you can use to install Windows on your PC. Note that this is kind of different from the usual installation process as it could erase your computer’s current settings and data on the primary drive. Thus, before you proceed, you need to backup all your data into some removable drive and then use the Media Creation Tool to make a bootable drive.
  • After making the bootable drive, you need to plug it into your computer and then reboot.
  • Next, tap the F10 or Esc key to open the boot options.
  • Now set the boot priority of the removable drive the highest. Once the setup comes forth, follow the next onscreen instructions and install Windows without any problems.
Read More
Manually cleaning your PC registry
Manually cleaning your PC registry may be the worst or best thing you ever decide to do. Registry keys that lie around on your computer, unused, can cause your computer to lag. This can end up in your computer not being able to load the easiest of programs and being slow at loading anything, let alone something that would take up a decent amount of memory. If your computer has slowed to almost an absolute stop, it is most probably the registry’s fault and the only option then is to clean it. You can get programs to do this for you, but they can be riddled with inaccuracies and viruses that could harm your computer even more. This is why some people choose to manually edit their computer. However, this is not without its flaws.

Registry Keys

Registry keys tend to have really long names. These names will be full of numbers and hyphens and will most likely give you no indication of what they do. Even some computer experts find it hard to understand what every computer’s registry keys do. This can make it very hard to see which ones are causing the problem; and if you don’t know what’s causing the problem, then there is no way you will be able to fix it. Some registry keys will be completely menial in what they do but some could be vital to even allow Windows to work on your computer.

Manual Registry Repair

Registry keys can also cause huge problems if you manually delete the wrong one. A lot of registry cleaners have the option to revive a key that they have deleted on you, which means that fixing an error that they made would be easy enough to do. However, when you manually delete registry keys, it will be an awful lot harder to get them back to work again afterward. This can cause your computer many problems and if you delete even one wrong key it is possible your computer will not even start. With the horrid naming system they have as well, it makes it very hard to determine what is important and what is not, which means it is all too likely that you will delete something important. However, those are the risks you have to take when you are cleaning out your registry. A registry cleaner has the same likelihood of messing with your computer and deleting something wrong that you have, so it is the same either way however a registry cleaner will do it with less hassle. But, some people say that if you do it yourself, it’s more likely to be right; that is why they prefer to do it manually and that is alright.

Conclusion

So, if you are manually deleting your registry keys that are unused, you’ll have to use a program that comes with Windows known as ‘regedit.exe’ which is incredibly difficult to use but may just be worth the hassle in the end. So, you don’t really need to put up with a slow computer, but be careful when messing with your registry manually! To repair and resolve this and other PC-related issues Click Here to download Restoro.
Read More
1 2 3 171
Logo
Copyright © 2023, ErrorTools. All Rights Reserved
Trademark: Microsoft Windows logos are registered trademarks of Microsoft. Disclaimer: ErrorTools.com is not affiliated with Microsoft, nor claims direct affiliation.
The information on this page is provided for information purposes only.
DMCA.com Protection Status