Logo

An Easy Guide to Fixing Error Code 12

Error Code 12 - What is it?

Error code 12 is a typical Device Manager error code. It usually pops on the computer screen when the computer experiences device driver problems or system resource conflicts.

Error code 12 is mostly displayed on the computer screen in the following format:

‘This device cannot find enough free resources that it can use. If you want to use this device, you will need to disable one of the other devices on this system.’

Solution

driverfix boxError Causes

The error code 12 occurs when 2 devices installed on your PC are accidentally assigned the same I/O (input/output) ports or the same direct memory access channel.

This assignment is known to be made either by BIOS (Basic Input/output system) or by the operating system. It can sometimes be assigned by a combination of the two. Also, code 12 can also appear on your monitor screen if the BIOS didn’t allocate enough resources to the device.

Although this error code is not fatal, it is nonetheless advisable to fix it immediately to avoid inconvenience and hassle. This error is most likely to lower and hamper the performance of your system.

Further Information and Manual Repair

Here are some of the easiest and most effective do-it-yourself methods to resolve error code 12 on your PC. To perform these fixes, you don’t have to be technically sound or a computer programmer for that matter. Simply follow the steps to fix the problem right away.

Method 1 - Use the Troubleshooting Wizard to identify the Conflict

To repair error code 12, simply go to the start menu and type Device Manager in the search box. Now go to the Device Properties dialog box. After that click on the ‘General Tab’ and now access Troubleshoot to start the Troubleshooting Wizard.

The Wizard will ask you some questions and provide you a solution accordingly. Follow the instructions and resolution steps provided by the troubleshooting wizard to repair error code 12 on your PC.

Method 2 - Disable the Device to Resolve

By disabling the problematic device in the Device Manager, Windows will ignore that piece of hardware. Once disabled, Windows will then no longer assign system resources to that device and no driver/software will be able to use that device.

To disable, go to the Device Properties in the Device Manager and then click the Driver tab. Click disable located at the bottom of the window. Then you will be prompted with a message stating ‘Disabling this device will cause it to stop functioning. Do you wish to disable it?’ Click yes to continue and then click OK to save changes.

Method 3 - Restore Your PC to its Previous State

Another method to resolve error code 12 is to restore your PC to its previous state when it was working properly.

For this, it is important to backup all your data first to avoid data loss issues that are likely to occur during this process. Creating backups manually can be a time-consuming and tedious task. To save time and quicken the process, it is best to install a program like DriverFIX.

DriverFIX is a user-friendly and intuitive device driver management software that helps backup all your data automatically and efficiently, while simultaneously restores your PC back to its previous state before you encountered problems.

Click here to download DriverFIX on your system to resolve error code 12

Do You Need Help with Your Device?

Our Team of Experts May Help
Troubleshoot.Tech Experts are There for You!
Replace damaged files
Restore performance
Free disk space
Remove Malware
Protects WEB browser
Remove Viruses
Stop PC freezing
GET HELP
Troubleshoot.Tech experts work with all versions of Microsoft Windows including Windows 11, with Android, Mac, and more.

Share this article:

You might also like

Creating custom Keyboard shortcuts in Windows
Keyboard shortcuts are undeniably one of the most utilized ways and are helpful in maximizing productivity through the various applications at top speed in Windows 10. It offers the option to create custom keyboard shortcuts that allow users to launch apps, and even websites, instantly. There are already tons of keyboard shortcuts that are built-in in Windows 10 but in case you don’t know, you can actually create new ones. Doing so is not a difficult task and in this post, you will be guided on how you can exactly create custom keyboard shortcuts in your Windows 10 computer. Most users would create desktop shortcuts or pin the apps in the taskbar to speed up the process of working on their computers. It is an easy task to do since you can easily do it by dragging an app from the Start Menu to the desktop or by simply right-clicking on the executable app and selecting the “Create Shortcut” option. However, doing so would take physical effort and there are times when you have to minimize all the apps to get to the desktop so you can click the shortcut and this is where the Custom Keyboard Shortcuts come in handy. You can create Custom Keyboard Shortcuts in Windows 10 for various programs – from the traditional desktop apps to the new universal apps – you can fling in a shortcut so that you can instantly open them faster compared to when doing it manually and besides this also wouldn’t affect any of the ongoing system activity. To get started, you need to follow the steps provided below carefully.

To add Custom Keyboard hotkeys to a program and website desktop shortcuts, here’s what you have to do:

Step 1: First, you have to right-click on the app or website and select Properties. Step 2: After that, go to the Shortcut tab and from there, you will see the “Shortcut key” textbox which allows you to enter a new or custom keyboard shortcut for the app or website. Step 3: In the textbox field, input your preferred letters to set up the new hotkey. Keep in mind that this custom shortcut has to be combined with the Ctrl + Alt keys which means that if you want to select “N”, you have to tap the Ctrl + Alt + N keys. Step 4: Once done, click on the Apply and OK buttons to save the changes made and then close the window. Step 5: After that, tap the newly created keyboard shortcut, Ctrl + Alt + N keys again to open the app or website you’ve set up earlier.

To add Custom Keyboard hotkeys to a desktop app or an independent program that can be installed using direct download, here’s what you have to do:

Step 1: First, open the Start Menu and look for the icon/tile of the required app in the menu. However, if you are not able to find the desired app, then just click on the All Apps option to navigate through all the apps that are installed on your PC. Step 2: Once you find the app, just right-click on it and select More and then click on the “Open file location” option. Step 3: This will open a new window with the shortcut icon. Right-click on the app’s shortcut icon and select Properties. Step 4: This will open the Properties window where you can add the shortcut combination. Keep in mind that just like the previous method, the custom shortcut has to be combined with the Ctrl + Alt keys. For instance, if you select E, then you also have to set a keyboard shortcut that includes Ctrl + Alt, so it will be, Ctrl + Alt + E. Step 5: Once you’re done, click on the Apply and OK buttons to save the changes made. You should now be able to use the custom shortcut key you’ve set.
Read More
Arrows keys are not working in Microsoft Excel
As you know, Excel sheet is frequently acclaimed as one of the most useful software that allows users to create spreadsheets, crunch numbers as well as prepare a business report. Usually, tapping the arrow keys to move from one cell to another. However, there are times when you might experience trouble in tapping them – for instance, they won’t work when you tap them. This kind of problem can be quite frustrating since no matter what you do, especially when you tap the arrow keys, instead of a single cell, it moves the entire spreadsheet. If you are one of the users who experience this problem, worry no more for this post will guide you on what you can do to fix it. When arrow keys won’t function as intended in Excel spreadsheets, it could be due to unintended behavior of the Scroll key or it could be related to some issues with the keyboard driver. Whatever the cause is, here are some suggestions you can check out to fix it.

Option 1 – Try to disable the Scroll Lock

The first thing you can do to fix this problem with arrow keys is to disable the Scroll Lock. Although doing this is easy, newer laptops don’t actually come with it so if your keyboard does not come with a scroll key, all you have to do is tap the Fn key and disable Scroll Lock. Aside from that, you could also use the on-screen keyboard to turn off the Scroll Lock. You will see its status on the Excel sheet which will help you to double-check. Moreover, you could also tap the Shift + F14 keys to toggle off the Scroll Lock. To use the on-screen keyboard to turn off Scroll Lock, follow the steps below.
  • Tap the Windows key and type “on-screen keyboard” and then tap Enter.
  • Once the on-screen keyboard is opened, you should see that the Scroll Lock is on the “On” position since the ScrLk keys are in blue.
  • Like pointed out earlier, you can utilize the Scroll Lock indicator located in the status bar as well as disable or enable the scroll key by using this feature on Microsoft Excel.

Option 2 – Try turning on the Sticky key

If disabling the Scroll Lock did not fix the problem, you can try turning on the Sticky Key instead. A lot of users reported that this option fixed the problem for them. So you should try to turn on the Sticky key and to do that, follow the steps below.
  • First, type “control panel” in the Start Search and click on Control Panel from the search results.
  • Next, select the “Turn On Sticky Keys” option and click on OK.
  • After that, go back and uncheck the “Turn On Sticky Keys” option. This should fix the malfunctioning arrow keys on Excel.

Option 3 – Try running the Hardware and Devices Troubleshooter

The first thing you can do to fix the problem is by running the Hardware Troubleshooter. Although it won’t make much of a difference, there’s still a possibility that it could automatically fix the problem with these function keys. To use it, refer to these steps:
  • The first thing you need to do is click on Start and then on the gear-like icon to pull up the window for Settings.
  • After opening Settings, look for the Update and Security option and select it.
  • From there, go to the Troubleshoot option located on the left-hand side of the list.
  • Next, select Hardware and Devices from the list and open the Troubleshooter and run it. Once it is doing its job, wait for it to complete the process and then restart the system.
  • After the system restarts, check if the problem’s now fixed. If not, refer to the next option given below.

Option 4 – Update the keyboard driver

You can also update the keyboard driver to fix the problem. There are cases when an outdated or corrupted driver can fix the problem. To do so, follow the steps below.
  • Tap the Win + R keys to open the Run dialog box.
  • Then type “devmgmt.msc” in the field and hit Enter to open the Device Manager.
  • From there, look for the keyboard driver and click on it.
  • Next, right-click on the keyboard driver and select the Update driver option.
  • After that, click the “Search automatically for updated driver software” option to proceed.

Option 5 – Reinstall the keyboard driver

If updating the keyboard driver didn’t help, then you might want to reinstall it. How? Follow the steps below.
  • Tap the Win + R keys to launch Run.
  • Type in MSC into the box and tap Enter or click OK to open the Device Manager.
  • After that, a list of device drivers will be displayed. Look for the keyboard driver, right-click on it and then select “Uninstall device”.
  • After that, unplug the device and restart your PC.
  • Then plug your device back in. Assuming your device is connected to your PC, open the Device Manager again.
  • Next, click on the Action button and click the Scan for hardware changes button. That should fix the problem
Note: You could also completely uninstall the driver and go directly to the manufacturer’s website and download the latest driver for your hardware and then install it.
Read More
Fix Some apps need to be uninstalled
When you update or upgrade your computer to Windows 10, the setup will look for the compatibility of both the hardware and software. And in this process, if suddenly got an error message saying, “Some apps need to be uninstalled” or “You need to uninstall a program in order to continue”, you have to look for the program(s) that might be causing the compatibility issues. But worry not as this post will help you resolve the issue. Simply follow the given suggestions below.

Option 1 – Look for the incompatible programs

There are times when Windows 10 will point out the programs that are incompatible with Windows 10. In this situation, just click on the Uninstall and continue button and then wait for the process to be completed. For more information, you can check out the official site Ready for Windows by Microsoft. This site can help you determine which software versions are compatible with Windows 10 and which ones are not. All you have to do is select the Windows 10 version and type your App name, after that, you will see the results about its compatibility. Thus, it’s now easier for you to figure out which software is causing an issue and if there is a new updated version available that you can install instead.

Option 2 – Try to install the Windows Update in a Clean Boot State

Putting your PC in a Clean Boot state can also help you install Windows Updates or Upgrades without any trouble because, during this state, you can start the system with a minimum number of drivers and startup programs that will surely help you in isolating the root cause of the issue.
  • Log onto your PC as an administrator.
  • Type in MSConfig in the Start Search to open the System Configuration utility.
  • From there, go to the General tab and click “Selective startup”.
  • Clear the “Load Startup items” checkbox and make sure that the “Load System Services” and “Use Original boot configuration” options are checked.
  • Next, click the Services tab and select the “Hide All Microsoft Services” check box.
  • Click Disable all.
  • Click on Apply/OK and restart your PC. (This will put your PC into a Clean Boot State. And configure Windows to use the usual startup, just simply undo the changes.)
  • After that, try to install the Windows Updates or upgrade again.

Option 3 – Try creating a new user account

Creating a new user account can resolve the “Some apps need to be uninstalled” error when upgrading or updating your Windows 10 PC. All you have to do is create a new admin account and initiate the setup. And this is a new user account, there will be no third-party applications installed on your computer. Thus, the installation should go through without any trouble. And in case you’ve already installed programs for that user, you just have to uninstall them all and then re-run the setup.

Option 4 – Perform a clean install

If none of the options worked, you can try to clean install Windows 10. Just make sure that you have the ISO from the official Microsoft Website and then a bootable USB drive to install Windows 10 again. Take note that this will delete all the data from your drive where Windows 10 was installed previously.
Read More
Repair Windows 10 Update Error 0x80070003, 0x20007

Error Code 0x80070003, 0x20007 - What is it?

Update Error 0x80070003, 0x20007 One of the most common errors encountered by users who updated to Windows 10 is the Error Code 0x80070003-0x20007. Normally, this error code is accompanied by the message saying “Windows could not search for new updates. An error occurred while checking for new updates or your computer” or “Error(s) found: Code 0x80070003 Windows update encountered an unknown error”.

This update-related error is often encountered any time while your device automatically installs updates once there’s an available system update or during manually installing updates for a specific app. Regardless if you are using a tablet, laptop, or PC, this update-related error could occur after upgrading your system to Windows 10.

Solution

Restoro box imageError Causes

There are several reasons why the update-related Error Code 0x80070003-0x20007 occurs. This includes the following:

  • Windows Firewall-related problem
  • A conflict in your device’s system might be present
  • Not enough space in your RAM
  • Not enough space in your installation disk
  • Problems in your system memory

Further Information and Manual Repair

An effective way to address problems like the Error Code 0x80070003-0x20007 is by applying certain manual repair methods. However, ensure that you strictly follow instructions since one slight slip-up might result in critical issues. If you’re not knowledgeable enough, it would be best to consult help from a professional Windows technician or you can make use of an automated tool to solve any issues you’re encountering.

When you encounter the update-related Error Code 0x80070003-0x20007, you must take action immediately to address the problem to lessen the risk of losing all your data or damaging the Windows registry host.

In fixing Error Code 0xC1900101-0x30018, you can repeat the same steps used for 0xc000021a (Method One) then apply the following steps as well:

  • Uninstall your antivirus prior to upgrading your system
  • Ensure that you have a simple machine name with no periods, dashes, or hyphens.
  • Restart several times then try again.
  • Disable the General USB Devices in your machine like the Smart Card Reader.
  • If you use a SCSI hard disk, ensure that you have available drivers you can use as your storage such as a thumb drive, and ensure as well that it is connected. Once you’re on the Windows 10 setup, click on Custom Advanced Option then use the Load Driver command in order to load the right driver for the SCSI drive. If this fails, try switching to an IDE-based hard disk.
  • Once done, perform a clean boot then try restarting the device again.
  • If you are upgrading your system using the .ISO file, disconnect your device from the Internet during setup. If your device is connected to the Internet by LAN or Wi-Fi, you need to disable both first then proceed to set up again.
  • If you’re performing the update through Windows Update, disconnect from the Internet LAN or Wi-Fi once the download reaches 100% then proceed with the installation.
  • If this still does not work, you can try using the .ISO file in upgrading.
  • Switch to a local account if your machine is connected to a domain.
  • Disconnect all external devices attached to your machine including gaming controllers, external hard disk, USB keys, and printers.

If the above steps still do not work, you can try performing a repair by doing the following steps:

  1. Put the installation disc into the disc drive. Afterward, boot the computer.
  2. Once the message: “Press any key to boot from CD or DVD…” appears, press any key.
  3. Choose a language, currency, time, and a keyboard or another input method. Click Next.
  4. Click on Repair your computer
  5. Select the operating system that you wish to repair then click Next
  6. Open the Command Prompt by clicking it in the System Recovery Options dialog box.
  7. Type BOOTREC /FIXMBR then hit Enter
  8. Type BOOTREC /FIXBOOT then hit Enter
  9. Type Drive:bootBootsect.exe /NT69 All then hit Enter

Can’t seem to put up with the long and technical manual repair process? You can still fix this error by downloading and installing a powerful automated tool that will surely get the job done in a jiffy!

Read More
Fix Windows Update Error 0x80070BC9
As you know, every Windows Update is essential for every Windows operating system. They have to be regularly installed, especially since they include various security updates that are important to the system. However, there are times when Windows Update fails to execute properly and you get errors like the error code 0x80070BC9. When you encounter this particular Windows Update error, you will get the following error message on your screen:
“0x80070BC9 – ERROR_FAIL_REBOOT_REQUIRED. The requested operation failed. A system reboot is required to roll back changes made.”
This kind of Windows Update error is most likely caused by a newly installed problematic software, corrupted Windows Update files, or policies that restrict the behavior of the Windows Module Installer. The Windows Module Installer, also known as “WMIW” or “TiWorker.exe”, is the one that checks for new updates from the Windows server and installs them on your computer. This is why you need to make sure that you do not have any policies that control the start behavior of the Windows Module Installer since this service must not be hardened to any start value and should be managed by the operating system. To resolve the Windows Update error code 0x80070BC9, you can check out the options provided below.

Option 1 – Try checking the status of the Windows Modules Installer Worker Service

Since the Windows Update error code 0x80070BC9 has something to do with the Windows Module Installer Worker service, you need to check its status in the Service Manager. Refer to the following steps to do so.
  • In the Cortana search box, type “services” and click on the Services icon to open the Services Manager. Alternatively, you can also tap the Win + R keys to launch the Run prompt and then type “MSC” in the field and hit Enter to open the Services Manager.
  • After opening the Services Manager, look for the Windows Modules Installer Worker Service.
  • Once you found it, check its status and make sure that its Startup type is set to Manual.
  • Now click on the Start button and see if it fixes the Windows Update error.

Option 2 – Run the Windows Update Troubleshooter

You might want to run a built-in Windows Update troubleshooter to resolve the Windows Update error. It is one of the things you can check out as it is known to automatically resolve any Windows Update errors like error code 0x80072EE2. To run this troubleshooter, go to Settings and then select Troubleshoot from the options. From there, click on Windows Update and then click the “Run the troubleshooter” button. After that, follow the next on-screen instructions and you should be good to go.

Option 3 – Try contacting the IT administrator to modify the group policies

You could also try to contact the IT administrator to have the group policies modified. This option is applicable for company-managed systems. As mentioned, one of the possible causes of the Windows Update error 0x80072EE2 is the policies that control the start behavior of the Windows Module Installer. Thus, you need to have them removed so that the Windows Module Installer Worker service is managed by the operating system itself. And since there could be many policies, it is highly advised that you contact your company’s IT administrator to get the job done for you.

Option 4 – Try to install the Windows Updates in a Clean Boot State

There are some instances that some conflicting programs installed in your computer might be the one that’s causing Windows Update error code 0x80070BC9. To identify which program is causing the problem, you need to put your computer in a Clean Boot State. To do so, follow the steps below.
  • Log onto your PC as an administrator.
  • Type in MSConfig in the Start Search to open the System Configuration utility.
  • From there, go to the General tab and click “Selective startup”.
  • Clear the “Load Startup items” check box and make sure that the “Load System Services” and “Use Original boot configuration” options are checked.
  • Next, click the Services tab and select the “Hide All Microsoft Services” check box.
  • Click Disable all.
  • Click on Apply/OK and restart your PC. (This will put your PC into a Clean Boot State. And configure Windows to use the usual startup, just simply undo the changes.)
  • From there, start to isolate the problem by checking which one of the programs you installed recently is the root cause of the problem.
Read More
The executable program that ...
If you are trying to start a service using the Windows Services Manager but you got an error message stating, “The executable program that this service is configured to run in does not implement the service”, then you’ve come to the right place as this post will provide you instructions on how you can fix this error. Since almost all program requires service to run on your computer, if the service is not listed in the corresponding registry key, then you will most likely encounter this error on your Windows 10 computer. Here’s the entire content of the error message:
“Windows could not start the service on Local Computer. Error 1083: The executable program that this service is configured to run in does not implement the service.”
To fix this error, you have to add the service name in the respective host in the Registry Editor, and to do that, here are some steps you need to take on. Step 1: The first thing you have to do is to take note of the service name that’s given in the error message. For instance, you get the “Windows Management Service. Step 2: Next, you need to open the Services Manager by tapping the Win + R keys and typing “services.msc” in the Run dialog box, and then tapping Enter. Step 3: After opening the Services Manager, look for the Windows Management Service and once you see it, double click on it. This will open a new mini window. Step 4: From the newly opened window, copy the Service name and the Path to executable under the General tab. If the path to the executable is displayed as “C:/Windows/system32/svchost.exe -k netsvcs –p”, you need the “netsvcs” part only. Note that it can be different for different services and you need the part that comes after “-k”. Step 5: Now tap the Win + R keys again to open Run utility and type “Regedit” in the field and click OK to open the Registry Editor. Step 6: After that, navigate to the following registry path:
ComputerHKEY_LOCAL_MACHINESOFTWAREMicrosoftWindows NTCurrentVersionSvchost
Step 7: From the given registry path, look for a key named “REG_MULTI_SZ” located on your right-hand side. This key is named after the “Path to executable” part. For instance, you should see “netsvcs”. Step 8: Double click on the REG_MULTI_SZ key and enter the Service name that you’ve copied earlier and then write it down at the end of the preset list. Step 9: Now save the changes you’ve made and try to open the program or run the service again.
Read More
Razer Iskur gaming chair for healthy gaming
Razer Iskur
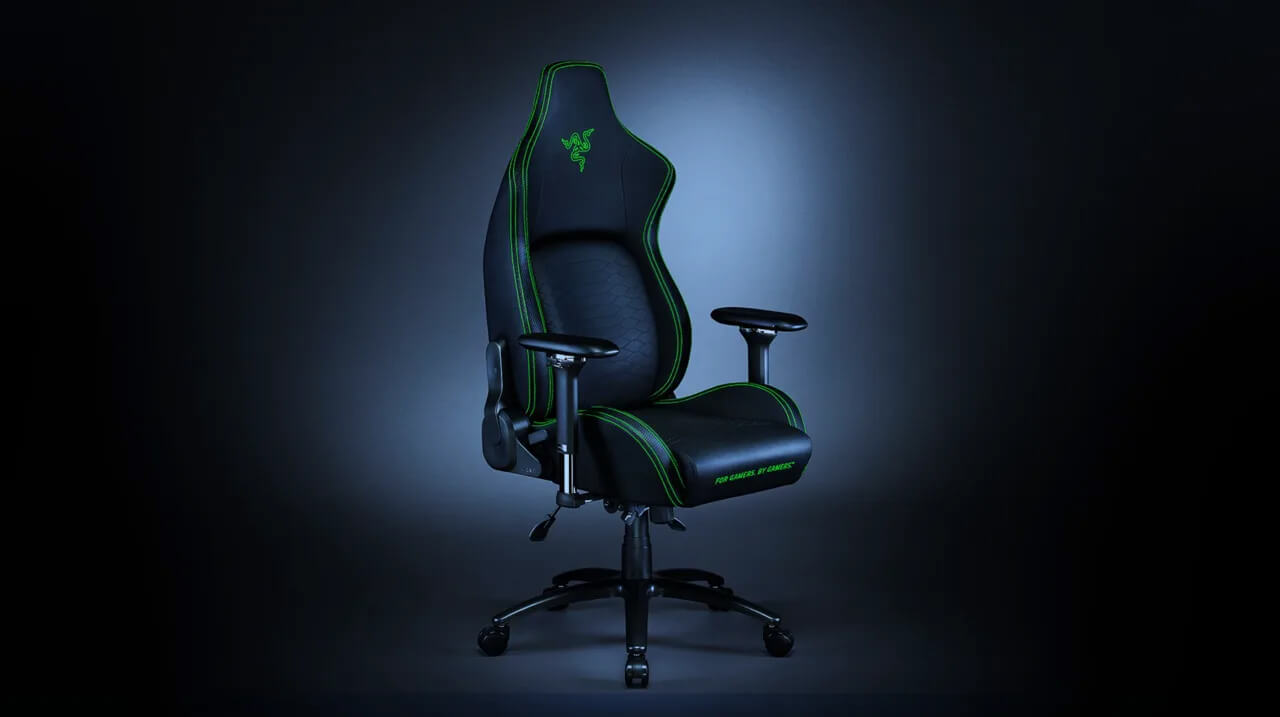
It seems that last few days we were riding some Razer bandwagon but rest assured that we are not sponsored by them in any way, truth is that simply they come up with some interesting accessories which I believe are worth covering. Gaming Chair itself comes in two colors, fully black and green black combination and it is not really an entry-level chair if we are talking about price. The chair itself is around 600USD depending on the distributor and considering that price range it is placed in more top cream of gaming chairs but it is worth every dime.

Iskur Specifications

Iskur is made of a steel frame with a reinforced plywood lumbar support frame for added weight tolerance. Frame and lumbar support are surrounded with memory foam and all of that is wrapped in cotton and polyester layer which is again wrapped in multi-layer synthetic leather making the chair very durable for long hours of daily use. The chair also comes with a memory foam head cushion which is detachable and removable if you do not wish to use it. On the Razer website among specifications, it stands that the chair is best suited for persons from 5’6” – 6’2” (170 – 190cm) height and up to 299lbs (136kg).

Features

The chair has, of course, height adjustment as any gaming chair and surprisingly it has great control for the armrest. The armrest can be adjusted in 4 different ways: up & down, left & right, forward & backward, and inward & outward. The backrest can be also tilted up to 26 degrees angle. All of these features are great and good but there is one more feature that really makes this chair stand out from rest and it is Lumbar support. Iskur has an adjustable lumbar support system on the lower part of the backrest. With your lumbar support secured, you can then make the necessary tweaks to optimize the rest of your posture using the Razer Iskur’s adjustable height, backrest, and armrests.

Conclusion

Razer Iskur is neither cheapest nor perhaps the best gaming chair you can buy, but it is a really good one. It is well manufactured and made to feel and look like a premium product that actually it is.
Read More
Remove EliteUnzip from your computer

EliteUnzip is a program developed by Mindspark Interactive. This program lets you compress and extract all the popular archive types.

From the Author:

Elite Unzip is a program for creating and extracting archive files; it has support for over 20 file formats. This application downloads onto your computer in two parts: one for your desktop, and one for your browser. They both work together to make packing and unpacking archive files easy.

While EliteUnzip itself is not a threat, it comes bundled with other software that might cause a problem to your computer.

Due to its bundled nature, several anti-virus scanners have marked EliteUznip as a Potentially Unwanted Program and is therefore not recommended to keep on y our computer, especially because there are other free programs that do the same functions without the additional bundled software.

About Potentially Unwanted Applications

Precisely what is a Potentially Unwanted Program (PUP)?

Have you ever found out an unwanted program running on your computer and wondered how the heck it got there? These unwanted programs, which are known as Potentially Unwanted Programs, or PUPs in short, often tag along as a software bundle when downloading the program and can result in major problems for computer users. It’s clear by the name – unwanted programs – but did not really constitute “malware” in the traditional sense. The reason for this is that the majority of PUPs enter into users’ computers not because they exploit security weaknesses, for instance, but mainly because the users give consent to download it – unknowingly in many instances. No matter whether it is regarded as malware or otherwise, PUPs are almost always bad for a computer owner as they might bring on adware, spyware, keystroke logging, and other nasty “crapware” features on your PC.

What do PUPs do on your computer, precisely?

Most Potentially Unwanted Programs comes in the form of adware, which generally aims to exhibit lots of annoying pop-up ads, banners, coupons, and deals on websites you explore. PUPs that come in the form of browser add-ons and toolbars are widely identifiable. They may track your online activities, redirect your search results to risky sites where adware and spyware can be downloaded, hijack your home page, and slow your browser down to a crawl. PUPs carry a dangerous bite if left behind unchecked. The worst part of setting up a PUP is the spyware, adware, and keystroke loggers that could hide inside. These are programs that don’t do anything good for you; in addition to taking over space on the hard disk, they will also slow down your PC, often change settings without your permission, and the list of bothersome features goes on and on.

Protect yourself from unwanted programs

• When installing anything on your desktop, always read the fine print, like the license agreement. Don’t accept terms of use that are for bundled applications. • Normally, when installing a software program you get two options, ‘Standard Installation’ and ‘Custom Installation’. Don’t opt for ‘Standard’ as unwanted programs might automatically be installed that way! • Use good anti-malware software. Try Safebytes Anti-malware which can spot PUPs and treat them as malware by flagging them for deletion. • Be alert when you download and install freeware, open-source programs, or shareware. Nowadays ‘freeware’ isn’t actually freeware – but crapware bundling nonsense. • Only use official product sites for downloading applications. Steer clear of download websites altogether since most websites compel users to download the program with their own download manager, which is often bundled up with some kind of PUPs.

Virus Blocking Access To Safebytes Site And Preventing Anti-Malware Downloads – What You Should Do?

All malware is inherently unsafe, but certain kinds of malicious software do a lot more damage to your computer or laptop than others. Some malware variants alter browser settings by adding a proxy server or change the computer’s DNS configuration settings. When this happens, you will be unable to visit some or all of the sites, and therefore unable to download or install the necessary security software to eliminate the malware. If you are reading this, chances are you’re stuck with a virus infection that is preventing you to download and install Safebytes Anti-Malware software on your computer. There are some actions you can take to circumvent this issue.

Install in Safe Mode

In the event the malware is set to run at Windows start-up, then booting in safe mode should avoid it. Since only the minimal applications and services start-up in safe mode, there are hardly any reasons for conflicts to happen. The following are the steps you should follow to start your computer into the Safe Mode of your Windows XP, Vista, or 7 computers (go to Microsoft site for directions on Windows 8 and 10 computers). 1) Tap the F8 key continuously as soon as your computer boots, however, before the large windows logo comes up. This should bring up the Advanced Boot Options menu. 2) Make use of the arrow keys to select Safe Mode with Networking and press ENTER. 3) Once you get into this mode, you should have internet access once again. Now, obtain the malware removal software you need by using the web browser. To install the program, follow the guidelines in the setup wizard. 4) Following installation, run a full scan and let the program eliminate the threats it finds.

Download the antivirus software in a different internet browser

Some malware mainly targets particular browsers. If this sounds like your case, make use of another internet browser as it may circumvent the virus. If you appear to have malware attached to Internet Explorer, then switch over to a different browser with built-in safety features, such as Firefox or Chrome, to download your favorite anti-malware program – Safebytes.

Install antivirus on a thumb drive

Here’s yet another solution which is utilizing a portable USB anti-malware software package that can check your system for malware without needing installation. Adopt these measures to use a flash drive to clean your infected system. 1) Download the anti-malware on a virus-free computer. 2) Plug the pen drive into the uninfected computer. 3) Double click on the exe file to open the installation wizard. 4) When asked, select the location of the pen drive as the place where you want to store the software files. Follow the directions to complete the installation process. 5) Transfer the thumb drive from the uninfected computer to the infected PC. 6) Double-click the anti-malware software EXE file on the thumb drive. 7) Click on “Scan Now” to run a scan on the affected computer for viruses.

Benefits and Features of SafeBytes Anti-Malware

If you are looking to purchase anti-malware for your PC, there are various brands and applications for you to consider. A few of them are great and some are scamware applications that pretend as authentic anti-malware software waiting to wreak havoc on your computer. You need to pick a tool that has gained a good reputation and detects not only computer viruses but other types of malware as well. When considering commercial application options, many people opt for popular brands, such as SafeBytes, and are very happy with them. SafeBytes anti-malware is really a powerful, highly effective protection application intended to help users of all levels of IT literacy in finding and removing harmful threats out of their computer. This application could easily identify, remove, and protect your computer from the most advanced malware intrusions such as adware, spyware, trojan horses, ransomware, worms, PUPs, as well as other possibly damaging software applications.

There are lots of great features you’ll get with this security product. Below are a few of the best ones:

Real-Time Protection: SafeBytes provides real-time active monitoring service and protection against all known computer viruses and malware. It will monitor your personal computer for suspicious activity regularly and shields your personal computer from unauthorized access. Best AntiMalware Protection: Safebytes is built on the very best virus engine in the industry. These engines will find and remove threats even during the early phases of a malware outbreak. Fast Multi-threaded Scanning: SafeBytes’s virus scan engine is one of the quickest and most efficient in the industry. It's targeted scanning substantially increases the catch rate for viruses that are embedded in various PC files. Web Protection: SafeBytes inspects the links present on a webpage for possible threats and tells you whether the website is safe to view or not, through its unique safety rating system. Light-weight: SafeBytes is well known for its minimal impact on computer resources and great detection rate of numerous threats. It operates quietly and efficiently in the background so you’re free to make use of your PC at full power all of the time. Premium Support: SafeBytes gives you 24/7 technical support, automatic maintenance, and upgrades for the best user experience. SafeBytes has created a wonderful anti-malware solution to help you conquer the latest malware threats and virus attacks. Once you have downloaded and installed SafeBytes Anti-Malware, you will no longer have to bother about malware or other security concerns. So if you want sophisticated forms of protection features & threat detections, purchasing SafeBytes Anti-Malware will be worth the money!

Technical Details and Manual Removal (Advanced Users)

To remove EliteUnzip manually, go to the Add/Remove programs list in the Control Panel and choose the program you want to get rid of. For internet browser plug-ins, go to your browser’s Addon/Extension manager and select the plug-in you want to remove or disable. You will additionally also want to totally reset your internet browser to its default settings. To make sure of complete removal, find the following Windows registry entries on your system and remove it or reset the values appropriately. However, this is often a tricky task and only computer professionals could perform it safely. Also, certain malware is capable of replicating itself or preventing its deletion. Carrying out this malware-removal process in Safe Mode is suggested.
Files: %PROGRAMFILES%\EliteUnzip_aa\bar.bin\aaSrcAs.dll %PROGRAMFILES(x86)%\EliteUnzip_aa\bar.bin\aabar.dll %PROGRAMFILES%\EliteUnzip_aa\bar.bin\aaHighIn.exe %PROGRAMFILES(x86)%\EliteUnzip_aa\bar.bin\CrExtPaa.exe %USERPROFILE%\Application Data\EliteUnzip_aa %USERPROFILE%\AppData\LocalLow\EliteUnzip_aa %UserProfile%\Local Settings\Application Data\Google\Chrome\User Data\Default\Extensions\gaklecphgkijookgheachpgdkeminped %LOCALAPPDATA%\EliteUnzip_aa %USERPROFILE%\Meus documentos\Downloads\EliteUnzipSetup.EliteUnzip_aa.ffjcmnpnoopgilmnfhloocdcbnimmmea.ch.exe %PROGRAMFILES(x86)%\aaUninstall Elite Unzip.dll %USERPROFILE%\Downloads\EliteUnzipSetup.exe C:\Program Files\EliteUnzip\EliteUnzip.exe Search And Delete: RebootRequired.exe IAC.UnifiedLogging.dll DesktopSdk.dll IAC.Helpers.dll UnifiedLogging.dll SevenZipSharp.dll 7z.dll 7z64.dll LogicNP.FileView.WPF.dll LogicNP.FolderView.WPF.dll LogicNP.ShComboBox.WPF.dll lua5.1.dll Registry: HKEY_CURRENT_USER\Software\AppDataLow\Software\EliteUnzip_aa HKEY_LOCAL_MACHINE\SOFTWARE\Microsoft\Windows\CurrentVersion\Run, value: EliteUnzip EPM Support HKEY_LOCAL_MACHINE\SOFTWARE\Microsoft\Windows\CurrentVersion\Run, value: EliteUnzip Search Scope Monitor HKEY_CURRENT_USER\Software\EliteUnzip_aa HKEY_LOCAL_MACHINE\SOFTWARE\Wow6432Node\Microsoft\Internet Explorer\Toolbar, value: ef55cb9f-2729-4bff-afe5-ee59593b16e8 HKEY_LOCAL_MACHINE\SOFTWARE\Wow6432Node\Microsoft\Windows\CurrentVersion\Run, value: EliteUnzip AppIntegrator 64-bit HKEY_LOCAL_MACHINE\SOFTWARE\Wow6432Node\Microsoft\Windows\CurrentVersion\Run, value: EliteUnzip EPM Support HKEY_LOCAL_MACHINE\SOFTWARE\Wow6432Node\Microsoft\Windows\CurrentVersion\Run, value: EliteUnzip Search Scope Monitor HKEY_LOCAL_MACHINE\SOFTWARE\Microsoft\Windows\CurrentVersion\Run, value: EliteUnzip AppIntegrator 32-bit HKEY_LOCAL_MACHINE\SOFTWARE\Microsoft\Windows\CurrentVersion\Run, value: EliteUnzip AppIntegrator 64-bit HKEY_LOCAL_MACHINE\SYSTEM\CurrentControlSet\services\EliteUnzip_aaService HKEY_LOCAL_MACHINE\SYSTEM\ControlSet001\services\EliteUnzip_aaService HKEY_LOCAL_MACHINE\SYSTEM\ControlSet002\services\EliteUnzip_aaService HKEY_LOCAL_MACHINE\SOFTWARE\Microsoft\Windows\CurrentVersion\RunOnce, value: EliteUnzip_aabar Uninstall HKEY_LOCAL_MACHINE\SOFTWARE\Wow6432Node\EliteUnzip_aa HKEY_LOCAL_MACHINE\SOFTWARE\Wow6432Node\Mindspark\EliteUnzip HKEY_LOCAL_MACHINE\SOFTWARE\Mindspark\EliteUnzip
Read More
Infographic: How To Speed Up PC Startup

A slow PC startup can be pretty annoying. This usually results from various computer issues. If your computer is acting sluggishly, here are four ways to speed up your PC startup.

How-to-Sped-Up-PC-Startup
Read More
Cleaning your PC for better performance
Hello everyone, last time we were talking about disk cleanup and its benefits, but as you need to keep your System clean you should also clean and keep your hardware clean as well. Many system issues could be traced and could happen due to dirty PC. In this article, we will give you tips on how to perform safely cleaning on your computer and hopefully point good sides to it so you can develop a healthy habit of regularly cleaning it and keeping it tidy. dirty PC that needs cleaningKeeping your PC clean is not rocket science and you can do it with things you already and probably have in your house. One thing that I would recommend tho to purchase is antistatic gloves since they could prevent any kind of electrostatic discharges thus protecting your electric components. If you have the option to disconnect your PC and get it outdoors, I would highly recommend this approach since all the dust will be dusted outside and not in the room where your computer is. If you can not it is still ok, but since some portion of dust will be set in the room, you might need to dust your room after cleaning your computer.

Cleaning outside case & redusting inside

The first thing after disconnecting your computer is to dust it from outside, here you will need a vacuum cleaner and a brush, gently brush outside dust from your casing and vacuum it with your vacuum cleaner. You can use dustcloth for larger parts but use the brush for fans and connectors. After you have done cleaning the outside part, open the side of your computer casing, put on your antistatic gloves, and get a fine and soft brush, repeat dusting and vacuuming of the inner parts of your computer. If your computer is not regularly been cleaned this part will take a little longer since there would be excess dust inside and it will take a longer time to vacuum it all but keep going until you are left with no dirt.

Cleaning it inside

Fans are troublesome to clean since they will rotate when brushed and that could make you miss certain sports, in order to battle this get a tape and stick the fan into one position, brush areas that you can reach, then unstick it, rotate the head, stick it again in another position and dust off remaining areas which you could not reach before. If your computer is very dirty and some hard dirt is at bottom of the connectors, disconnect desired component and clean the connection properly. plug it back in immediately after cleaning to avoid connecting it somewhere else. Harder stains that could not be dusted could be cleaned with little alcohol. Get your dustcloth just a little wet with alcohol, just a corner, and gently wipe out sticky dust or spills if they are present. Leave it 10 minutes for alcohol to evaporate before plugging it back into an electric socket.

Thermal paste and cable management

If you have money and expertise, every 2 years would be a good idea to change the thermal paste on your processor, all you need to do is buy it from your local computer store online, remove the CPU fan clean the CPU and bottom of the fan and apply new thermal paste, place fan back and lock it. If you do not have expertise in this area, call someone who has to show you how it is done. When cleaning it would be a good idea if you do not have any cable management to do it now, nice and tidy cables not only look good, they also improve your air circulation inside your casing making your computer cooling better. once you are done with it, close back the casing side and plug it back in the wall.

Peripherals

When you are cleaning your computer, do yourself a favor and clean your keyboard, mouse, and screen as well. the keyboard can be quickly cleaned with compressed air in the can and screen and mouse with dustcloth. That's it, remember, keep your PC clean and tidy and enjoy the benefits of non-hardware malfunctions caused by dirt and dust. cleaned PC
Read More
1 2 3 171
Logo
Copyright © 2023, ErrorTools. All Rights Reserved
Trademark: Microsoft Windows logos are registered trademarks of Microsoft. Disclaimer: ErrorTools.com is not affiliated with Microsoft, nor claims direct affiliation.
The information on this page is provided for information purposes only.
DMCA.com Protection Status